


Are you looking for a fun and creative way to decorate your home this Halloween? Look no further, as making clay pumpkins can be enjoyable for kids and adults.
How to make clay pumpkin is a fun and creative craft project that can be enjoyed by people of all ages. Whether you’re looking to add a touch of handmade charm to your fall decorations or simply want to explore your artistic side, making a clay pumpkin is a great way to get started.
With a few basic materials and some simple steps, you can craft your own unique pumpkin designs that are perfect for displaying around your home or giving as thoughtful, seasonal gifts. Let’s get started on this delightful DIY project!
What Are the Benefits of Making Clay Pumpkins?
Making clay pumpkins not only allows you to express your creativity but it also has many other benefits. Here are just a few reasons why you should consider making clay pumpkins:
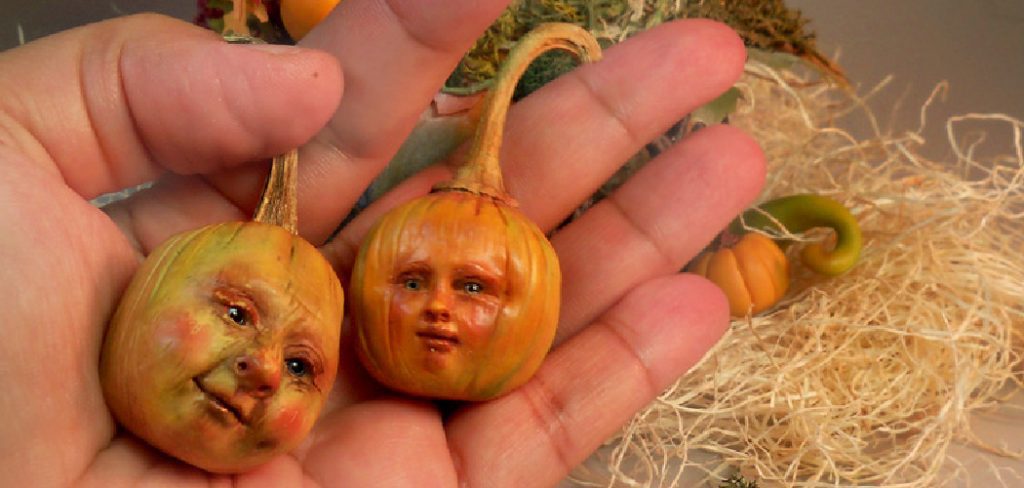
- Personalized and Unique: One of the most significant advantages of making clay pumpkins is that each can be personalized and unique to your liking. You can experiment with different shapes, sizes, colors, and textures to create a pumpkin that truly reflects your style.
- Eco-Friendly: Using clay as a medium for crafting is an eco-friendly option compared to other materials such as plastic or Styrofoam. It is biodegradable and does not harm the environment.
- Fun and Relaxing Activity: Making clay pumpkins is a fun and relaxing activity that can help reduce stress and anxiety. It lets you focus on the present moment and peacefully express your creativity.
- Inexpensive: You don’t need to break the bank to make clay pumpkins. Clay is an affordable material, and you can find it at most craft stores or even make your own with basic household items.
- Versatile: Clay pumpkins are versatile decorations that can be used in various ways. You can display them as part of a centerpiece, hang them on walls or doors,
What Will You Need?
Before we dive into the steps of making clay pumpkins, here’s a list of materials that you will need:
- Air-dry or oven-bake clay
- Rolling pin
- Pumpkin-shaped cookie cutter or knife
- Acrylic paints
- Paintbrushes
- Mod Podge (optional)
- Glitter (optional)
- Twine or ribbon (optional)
Now that you have all your materials ready let’s move on to the fun part – making your very own clay pumpkin!
8 Easy Steps on How to Make Clay Pumpkin
Step 1. Prepare Your Work Area:

Creating clay pumpkins can be a bit messy, so take some time to set up your work area properly. Choose a flat surface with ample space to work comfortably, such as a table or countertop. Cover the surface with wax paper, parchment paper, or a reusable craft mat to protect it from clay residue, paint, or glue. Gather all your materials and keep them within easy reach to maintain an efficient workflow. If you’re working with children, ensure their workspace is well-prepared and supervised. A clean and organized work area will make crafting smoother and more enjoyable.
Step 2. Condition Your Clay
Before shaping your pumpkin, you’ll need to condition the clay to make it soft, pliable, and easier to work with. Take a portion of air-dry or polymer clay and knead it thoroughly using your hands. If the clay feels too stiff or dry, add a small amount of water for air-dry clay or use a clay softener for polymer clay. Continue kneading until the texture is smooth and consistent. Properly conditioned clay will be less likely to crack and hold its shape better during crafting.
Step 3. Shape Your Pumpkin:

Once your clay is conditioned, take a portion and roll it into a smooth ball. This will serve as the base shape for your pumpkin. Gently press down on the top of the ball to slightly flatten it, creating a more natural pumpkin shape. Next, use a sculpting tool, toothpick, or the edge of a butter knife to carve vertical grooves around the sides of the clay ball, mimicking the ridges of a real pumpkin. Be sure to space the grooves evenly and adjust the depth to suit your desired texture. This step will give your pumpkin its distinctive look.
Step 4. Add a Stem:
To complete your pumpkin, shape a small piece of clay into a stem. Roll the clay into a short, tapered cylinder, giving it a natural and slightly twisted appearance. Attach the stem to the top center of your pumpkin by gently pressing it into place. To ensure the stem is secure, blend the base of the stem into the pumpkin using your fingers or a sculpting tool. Feel free to add small details like grooves or bends to make the stem look more realistic.
Step 5. Bake or Harden the Clay:
Once you are satisfied with the shape and details of your pumpkin, it’s time to bake or harden the clay, depending on the type you are using. Preheat your oven to the temperature specified in the clay’s instructions for oven-bake clay, and place your pumpkin on a baking sheet lined with parchment paper. Bake for the recommended time, ensuring you follow the manufacturer’s guidelines. If you use air-dry clay, set your pumpkin in a safe, dry area and allow it to harden completely, which may take 24 to 48 hours. Be patient during this process to ensure your pumpkin sets properly and is durable for use or display.
Step 6. Paint and Decorate Your Pumpkin:
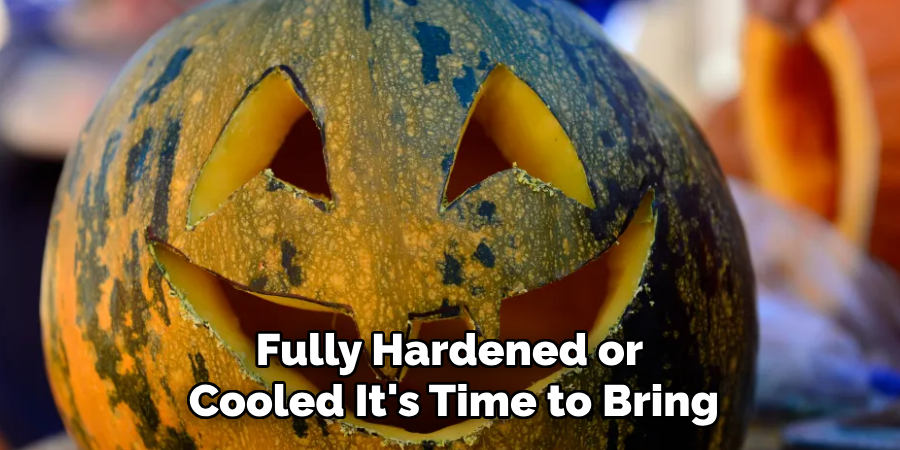
After your clay pumpkin has fully hardened or cooled, it’s time to bring it to life with paint and decorations. Use acrylic paints to add vibrant colors to your pumpkin, such as classic orange for the body and green or brown for the stem. Use a fine brush to paint highlights and shadows for added detail, giving your pumpkin depth and dimension. If you’d like, you can also add glitter, stickers, or other embellishments to personalize your creation. Allow the paint to dry completely before handling or displaying your pumpkin.
Step 7. Seal and Preserve Your Pumpkin:
Consider sealing your clay pumpkin with a clear acrylic sealant or varnish to ensure it remains vibrant and durable. This protective layer will help preserve the paint and prevent any cracking or wear over time. Spray or paint the sealant evenly over the entire surface of the pumpkin and allow it to dry thoroughly. A sealed pumpkin lasts longer and maintains a polished and professional finish, making it a beautiful addition to your seasonal decor.
Step 8. Display Your Pumpkin:

Once your pumpkin is sealed and completely dry, it’s time to showcase your masterpiece. Place it on a tabletop, mantel, or bookshelf as a festive decoration. You can even create a themed display with other fall-inspired crafts or incorporate your pumpkin into a centerpiece for special occasions. Whether indoors or outdoors, your handcrafted clay pumpkin is sure to add charm and a personalized touch to any space.
By following these eight easy steps, you can make your own clay pumpkin and let your creativity shine.
5 Things You Should Avoid
- Using the Wrong Type of Clay: Avoid using clay that is too brittle or dries too quickly, as it may crack or lose shape during sculpting. Opt for polymer or air-dry clay for better results.
- Skipping the Armature: Do not skip creating an armature or base structure for your pumpkin. This helps maintain the shape and prevents it from collapsing while you work on the details.
- Overloading with Water: When working with water-based clay, avoid using too much water, as it can make the clay excessively soft and challenging to mold, leading to unintended deformations.
- Ignoring Details Too Early: Don’t ignore the fine details of the pumpkin, like grooves or texture, during the sculpting process. It’s harder to add these elements after the clay has hardened.
- Rushing the Drying Process: Avoid placing your clay pumpkin in a hot environment or using excessive heat to speed up the drying process. This increases the risk of cracking or uneven drying. Always allow it to dry naturally.
How to Get Modeling Clay to Stick to a Pumpkin?
To get modeling clay to stick to a pumpkin, follow these steps:
- Clean the Surface of the Pumpkin: Before applying the clay, make sure the surface of the pumpkin is clean and free from any dirt or debris. This will help the clay adhere better.
- Use an Adhesive: To ensure the clay sticks securely, use a non-toxic adhesive like white glue or Mod Podge. Apply a thin layer on the areas where you want to attach the clay.
- Use Pressure: When placing the clay onto the pumpkin, gently press your fingers to create a bond between the two surfaces.
- Blend in with Water: If you are using water-based clay, dampen the pumpkin’s surface slightly with water before applying the clay. This will help create a stronger bond.
- Allow to Dry: Once you have attached all the desired pieces of clay to your pumpkin, allow it to dry completely before moving on to the next steps. This will ensure that the clay stays in place and doesn’t shift or fall off while you work on adding details.
- Add Finishing Touches: After the clay has dried, you can use paint or other materials to add final touches and enhance your pumpkin sculpture.
Conclusion
How to make clay pumpkin is a fun and creative project that allows you to personalize your seasonal decorations.
Following the steps above, from preparing your pumpkin to attaching clay securely and adding finishing touches, you can craft a unique piece showcasing your artistic flair. With patience and attention to detail, your clay pumpkin will be a striking addition to your autumn decor, perfect for display at home or as a thoughtful handmade gift.
Hopefully, this guide has helped you understand the essential dos and don’ts of working with clay for pumpkin sculpting. Happy crafting!
Specialization:
- Master of wheel-throwing, hand-building, and advanced glazing techniques
- Focus on creating both functional pottery and decorative art pieces
Recognition:
- Celebrated by collectors and art enthusiasts for creating one-of-a-kind pieces that blend artistry with functionality
- Participates in local and national exhibitions, earning accolades for his innovative designs and craftsmanship
Passion:
- Deeply committed to exploring and pushing the boundaries of ceramic artistry
- Continuously experiments with new materials, firing techniques, and artistic concepts to evolve his craft
Personal Philosophy:
- Believes in the transformative power of art, aiming to evoke emotions and connections through his ceramic creations
- Advocates for sustainability in ceramics, using eco-friendly materials and practices whenever possible