


Clay modeling is a delightful and versatile activity that appeals to both kids and adults, making it a perfect blend of creativity and learning. This hands-on craft not only fosters imagination but also enhances fine motor skills and patience.
Among the numerous projects one can create with clay, crafting a turtle stands out as a simple yet captivating option. Its unique blend of shapes and textures is easy to work with, making it ideal for beginners while still offering room for creativity for intermediate clay artists.
The purpose of this article is to provide a comprehensive step-by-step guide on how to make clay turtle models from scratch. From gathering essential materials to shaping techniques and adding creative finishing touches, this guide ensures a fun and rewarding experience. Whether you’re starting your clay modeling journey or looking for a charming new project, making a clay turtle is a wonderful place to begin.
Materials and Tools Needed
Before starting your clay turtle project, it’s important to gather the right materials and tools to ensure a smooth and creative process. Here’s what you’ll need:
Clay Options
- Air-dry clay: Ideal for beginners as it requires no kiln or oven—just leave it to dry naturally.
- Polymer clay: A versatile and durable option that hardens when baked in the oven.
- Modeling clay: Reusable and non-hardening, making it perfect for kids or practicing techniques.
Tools
- Sculpting tools or household substitutes: Items like toothpicks, plastic knives, or straws work well for detailing and shaping.
- Rolling pin or a smooth bottle: Used for flattening out clay evenly.
- Small bowl of water (for air-dry clay): Helps with smoothing edges and joining pieces seamlessly.
Optional Additions
- Paints and brushes: Use acrylic paints to add vibrant colors and patterns to your turtle.
- Sealant or glaze: Apply for a shiny, polished finish, especially for polymer or air-dry clay creations.
- Googly eyes or beads: Include these to give your turtle extra character and a playful touch.
With these materials and tools ready, you’ll have everything needed to bring your clay turtle to life!
How to Make Clay Turtle: Making the Turtle’s Body
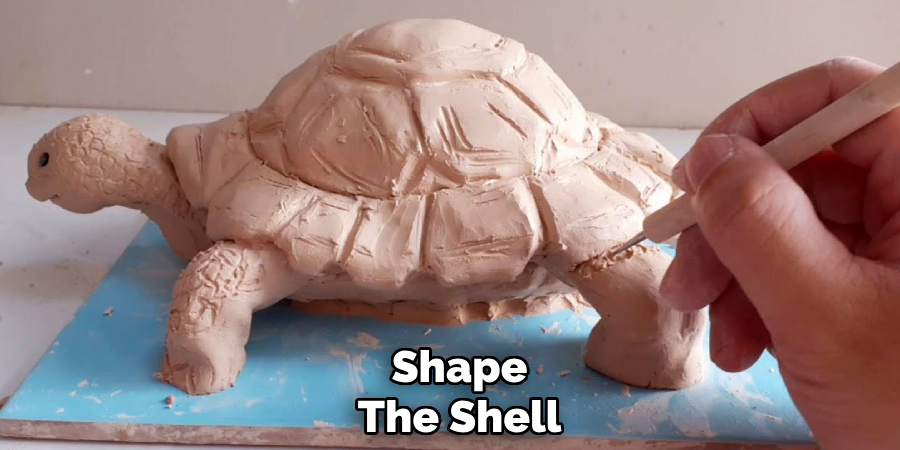
Step 1: Shape the Shell
Roll a ball of clay in your hands until it is smooth and free of cracks. Gently flatten the ball into a dome shape to form the turtle’s shell. Use a sculpting tool or toothpick to etch patterns onto the surface of the shell. Common designs include hexagons, lines, or spirals to mimic the natural texture of a turtle’s back. These details will bring depth and character to your creation.
Step 2: Create the Head
Take a small piece of clay and roll it into a smooth ball. Stretch it slightly into an oval shape, gently flattening one end to form the turtle’s head. For the face, use a toothpick or similar tool to create tiny indentations where the eyes will go. To add a playful element, insert small beads or googly eyes into the sockets. You can also use the tool to mark a small smile or other facial expressions if desired.
Step 3: Make the Legs and Tail
Divide the clay into four equal portions and roll each into a short cylinder. These will become the turtle’s legs. For added detail, texture the legs or shape the ends into flippers to give the appearance of a sea turtle. Position the legs around the base of the shell and gently press them into place. Finally, roll a small piece of clay into a cone shape to create the tail, attaching it at the rear of the shell.
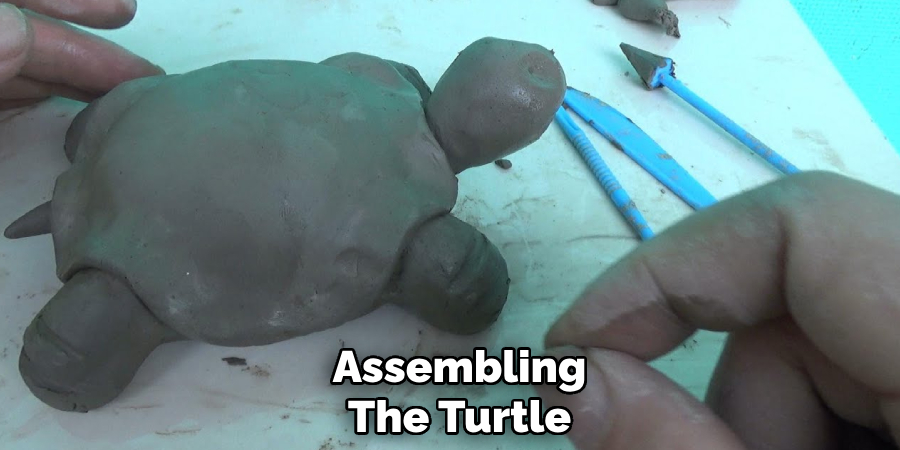
Assembling the Turtle
Attach Each Part to the Shell by Gently Pressing and Blending Edges
Begin assembling your turtle by carefully attaching the legs, tail, and head to the shell. Position each piece where it naturally fits—the legs should evenly surround the base of the shell, and the tail should point directly outward from the rear. Gently press the edges of each piece against the shell and use your fingers or a small sculpting tool to blend the clay at the seams. Smoothing the edges ensures the parts are structurally secure and gives a seamless, polished appearance.
Use Water (for Air-dry Clay) or Scoring (for Polymer Clay) to Strengthen Bonds
For air-dry clay, apply a small amount of water to the connection points before attaching each part. This helps soften the clay and creates a stronger bond as it dries. For polymer clay, use a scoring technique by scratching small crosshatch marks on the surfaces to be joined before pressing them together. This technique adds texture to create a firmer hold when baked.
Double-check Symmetry and Proportions for a Natural Look
Before allowing the clay to dry or bake, step back and review your turtle from different angles. Ensure the legs are evenly positioned, the head is centered, and the tail aligns naturally with the shell. These adjustments will help your finished turtle look balanced and realistic. With attention to detail and a bit of patience, your turtle sculpture will come to life!
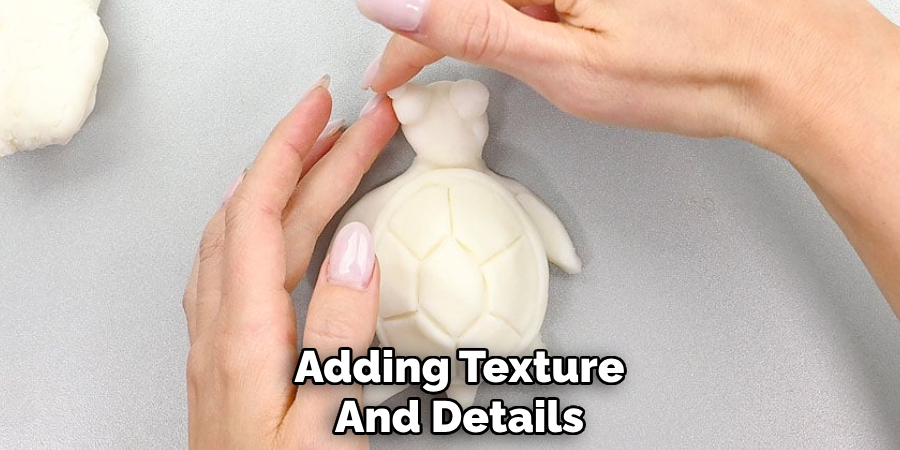
Adding Texture and Details
Carve Shell Texture Patterns
To give your turtle a realistic and artistic touch, start by carving patterns onto the shell. You can create hexagon segments to mimic a natural turtle shell, spirals for a whimsical design, or dots for a simpler look. Use a fine-tipped sculpting tool or a toothpick to etch these patterns into the soft clay gently. Take your time and ensure the design is consistent across the shell for a polished finish.
Add Fine Lines on Legs or Tail for Realism
Enhance the realism of your sculpture by adding fine lines to the turtle’s legs and tail. These lines can simulate the natural texture and folds found on a real turtle’s body. Use a needle tool or a similar fine-pointed object, carefully dragging it along the surface to create subtle lines. Start with light pressure to avoid distorting the shape and build up texture as needed.
Use a Small Tool to Poke Nostrils or Shape a Mouth
Details like nostrils and a mouth give your turtle sculpture expressiveness and charm. Use a fine-tipped tool to poke small indentations for nostrils at the appropriate spot on the head. Create a soft smile or a neutral expression by lightly pressing or carving a subtle line where the mouth should be.
Optional: Add Accessories
Bring personality to your turtle by adding decorative accessories. Consider creating a tiny clay flower, bow, or hat to place on the turtle’s back or head. These small additions can add a playful or artistic flair, making your sculpture truly one of a kind!
Drying or Baking the Clay
Air-Dry Clay
If you are using air-dry clay, allow your turtle sculpture to sit undisturbed in a well-ventilated area for 24–48 hours. To ensure even drying and prevent warping, turn the sculpture occasionally during this time. Be cautious when handling it, as the clay can remain fragile until it is fully hardened. Once dry, the turtle will be ready for painting or further detailing.
Polymer Clay
For polymer clay, drying involves baking to solidify your creation. Preheat your oven to the manufacturer’s recommended temperature, which is typically around 275°F (130°C). Place the turtle carefully on a baking sheet lined with parchment paper or aluminum foil.
Bake the sculpture for the specified duration, usually 15–30 minutes, depending on the size and thickness of the clay. Avoid overbaking, as excessive heat can cause the clay to discolor or burn. Once baked, allow the turtle to cool completely before handling or painting to avoid any accidental damage.
Painting and Finishing
Use Acrylic Paints for Vibrant Colors and Designs
Acrylic paints are an excellent choice for decorating your sculpted turtle, as they provide vibrant colors and adhere well to polymer clay. Before starting, ensure the surface of your sculpture is clean and free of dust to achieve a smooth finish.
Suggested Paint Ideas
For a classic look, paint the turtle’s body green and the shell shades of brown. Enhance the design by incorporating colorful patterning on the shell—consider stripes, swirls, or geometric shapes. Experiment with blending colors or adding gradients for a more dynamic effect. You can also include unique details, such as painted spots or subtle highlights, to mimic a real turtle’s texture.
Let Paint Dry Completely Between Layers
When applying multiple layers of paint, patience is key. Allow each layer to dry completely before moving on to avoid smudging or uneven finishes. Thin coats are ideal, as they prevent clogging details and yield a polished result.
Add Finishing Touches
Once the base colors are dry, add finishing touches such as spots, highlights, or shadowing to enhance the turtle’s features. These small details bring character and depth to your creation.
Apply Sealant or Gloss for a Protective and Shiny Finish (Optional)
To protect your painted turtle and give it a professional sheen, consider applying a sealant or gloss. This step adds durability and prevents the paint from chipping over time, ensuring your sculpture remains a delightful centerpiece for years to come.
Conclusion
Crafting a clay turtle from scratch is a rewarding and imaginative project that combines fun with creativity. It encourages patience as you sculpt its shape, precision in the finer details, and boundless imagination when selecting colors and adding unique features.
This engaging activity offers an excellent opportunity to explore your artistic side and create a charming keepsake. By experimenting with different colors, styles, and turtle designs, you can refine your skills and develop a personal touch. Now that you’ve learned “how to make clay turtle,” why not try creating new and inventive designs to expand your creative horizons?
Specialization:
- Master of wheel-throwing, hand-building, and advanced glazing techniques
- Focus on creating both functional pottery and decorative art pieces
Recognition:
- Celebrated by collectors and art enthusiasts for creating one-of-a-kind pieces that blend artistry with functionality
- Participates in local and national exhibitions, earning accolades for his innovative designs and craftsmanship
Passion:
- Deeply committed to exploring and pushing the boundaries of ceramic artistry
- Continuously experiments with new materials, firing techniques, and artistic concepts to evolve his craft
Personal Philosophy:
- Believes in the transformative power of art, aiming to evoke emotions and connections through his ceramic creations
- Advocates for sustainability in ceramics, using eco-friendly materials and practices whenever possible