


Making clay dinosaurs is a fun and engaging activity that sparks creativity and enhances fine motor skills. Suitable for both kids and adults, this hands-on project offers an imaginative way to learn about the fascinating world of dinosaurs while enjoying an artistic experience.
The activity encourages participants to shape, mold, and bring their very own dinosaurs to life using different types of clay. This guide will walk you through step-by-step instructions on how to make dinosaur with clay, ensuring a straightforward and enjoyable process for all skill levels. Whether you’re crafting for fun, educational purposes, or as part of a group activity, there are plenty of opportunities to adapt the project to suit different age groups and creative approaches. By the end, you’ll not only have a colorful clay dinosaur but also the satisfaction of creating something unique and exciting with your own hands.
Materials and Tools Needed
Creating a dinosaur with clay is a hands-on activity that requires only a few simple materials and tools. Below is a list of everything you’ll need to get started, with options to suit various preferences and skill levels.
Clay Options
- Air-dry clay: This option is safe for kids and beginner-friendly, as it doesn’t require baking to harden.
- Polymer clay: Ideal for more durable models, polymer clay can be baked to set permanently.
- Modeling clay: Reusable and perfect for experimenting, though it isn’t meant for permanent creations.
Tools
- Sculpting tools or household items: Items like toothpicks, plastic knives, or even popsicle sticks work well for shaping and adding details.
- Rolling pin (optional): Useful for flattening clay to create uniform shapes or textured surfaces.
- Paint and brushes: Perfect for decorating your completed dinosaur, especially if you’re working with white or plain clay.
Additional Materials
- Water: Helps to smooth out surfaces and fix minor imperfections.
- Protective covering for your workspace: Use wax paper, a craft mat, or any similar material to keep your area clean and protect surfaces.
Gathering these materials and tools will ensure a smooth and enjoyable crafting experience!
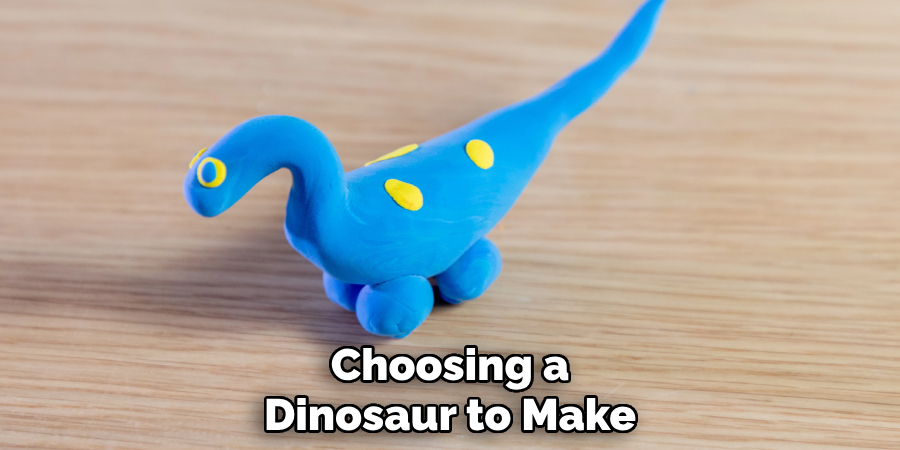
Choosing a Dinosaur to Make
Crafting a dinosaur is an exciting creative venture, and selecting the right one to make is an essential step to ensure your project is both enjoyable and achievable. Beginners may want to start with simpler designs that are easy to shape and assemble.
Simple Dinosaurs for Beginners
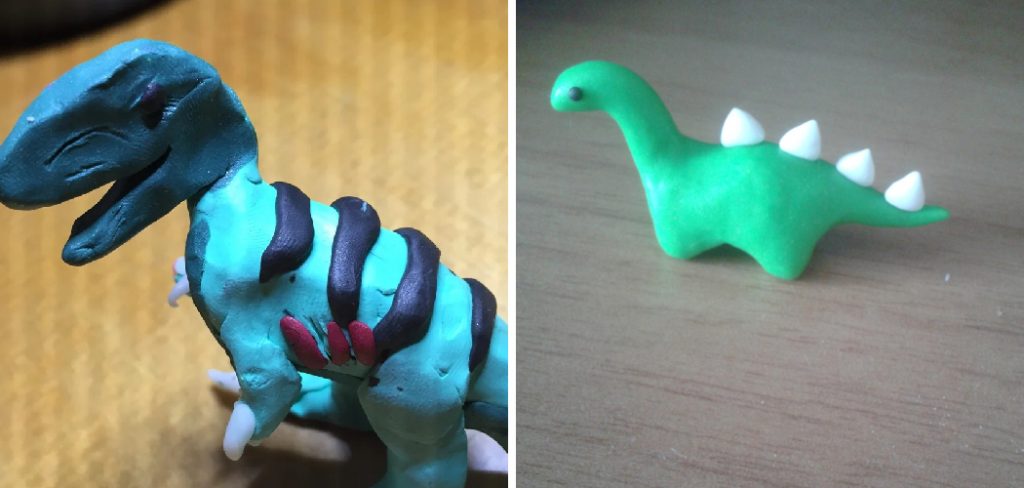
- Stegosaurus: This dinosaur is a great choice for its straightforward body structure combined with the iconic plates along its back and tail spikes. These features make it easy to personalize while still being manageable to create.
- Brontosaurus: Known for its long neck and tail, the Brontosaurus offers a simple and elegant design that is easy to mold with minimal details.
- Triceratops: Though slightly more detailed, the recognizable horns and frill make the Triceratops an exciting yet approachable option for beginners.
Considerations
- Skill level: Choose a dinosaur that matches your crafting experience to avoid frustration. Simple shapes and minimal intricate details are ideal for those just starting.
- Size: Starting with a palm-sized model is recommended as it’s easier to handle and shape without becoming overwhelming.
- Reference images: Keeping a visual guide nearby allows you to maintain anatomical accuracy and adds to the realism of your dinosaur creation.
Selecting the right dinosaur sets the stage for a fun and fulfilling crafting experience!
Preparing the Clay and Workspace
Step 1: Setting Up
Begin by preparing your workspace to ensure a smooth and enjoyable crafting experience. Cover your table or working surface with a protective sheet to avoid mess and make cleaning up easier. Arrange all the necessary tools, such as sculpting tools, a rolling pin, and a small knife, within easy reach. Lay out the clay of your choice so it’s accessible, and ensure the area is well-lit for detailed work.
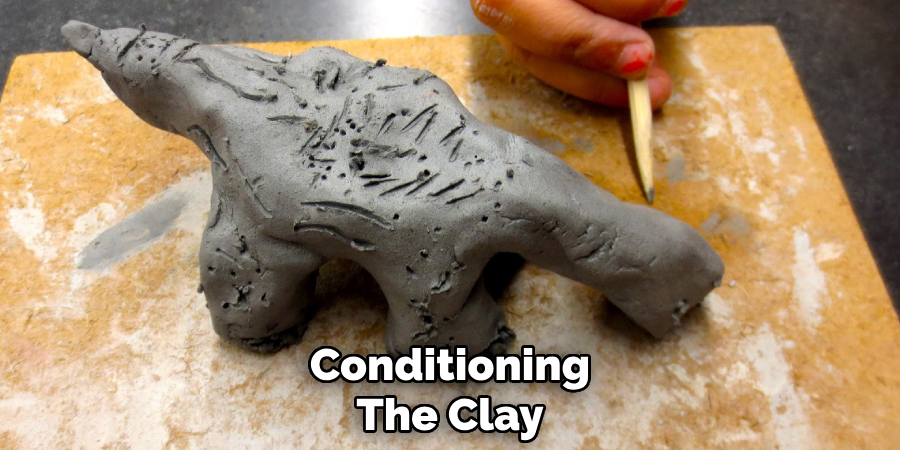
Step 2: Conditioning the Clay
To make the clay easier to work with, start by conditioning it. Take a small portion and knead it thoroughly in your hands. This process softens the clay, making it pliable and removing any trapped air bubbles that could jeopardize your model’s stability. Once softened, roll the clay into a smooth ball to make it easier to handle and shape.
Step 3: Planning the Parts
Before jumping into sculpting, pre-plan your dinosaur by breaking the clay into manageable portions. Separate enough clay for the head, body, legs, tail, and any other distinctive features like spikes or claws. Decide on a pose or shape in advance to ensure a cohesive design. Visualizing the final figure before starting assembly will streamline your process and improve the end result.
How to Make Dinosaur With Clay: Shaping the Body and Head
Forming the Body
To create the torso of your dinosaur, start by rolling a ball of clay into an oval or cylindrical shape. This will serve as the foundation of the dinosaur’s body. If you are aiming for a sitting or resting pose, gently flatten the bottom of the oval or cylinder to provide stability to the figure. Make sure the size and shape align with your pre-planned design, as this will ensure your dinosaur appears proportional.
Shaping the Head
Use a smaller ball of clay to form the head. Depending on your chosen dinosaur, you can sculpt the head into a rounded, elongated, or angular shape. Once the base shape is ready, add details to give the head character. For example, you can use a toothpick or a small sculpting tool to indent nostrils and eyes. To enhance realism, carefully add horns, raised ridges, or other unique features based on the dinosaur species you are crafting. Be patient during this step, as the details will greatly enhance the final appearance.
Attaching Head to Body
Once the head and body have been shaped, it’s time to attach them together. Use a toothpick to connect the two parts, ensuring they align properly for balance and stability. Alternatively, you can blend the meeting area with extra clay or smooth it with water and your fingers to create a seamless connection. Take your time with this step to smooth out the seam, as a clean attachment will make your sculpture look professional and polished.
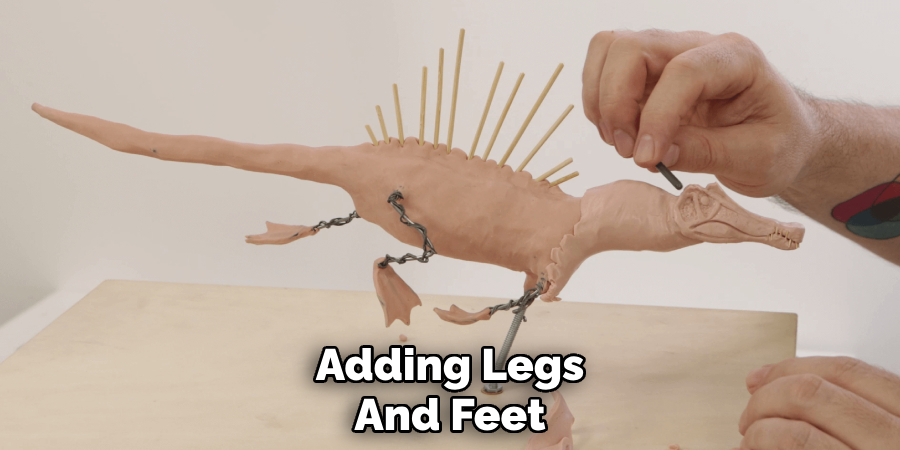
Adding Legs, Tail, and Features
Legs and Feet
To create the legs, roll and taper four small logs of clay, ensuring they are proportional to the size of your sculpture. Attach each leg to the body by gently pressing the clay into place and smoothing the edges for a secure bond. Flatten the base of each leg to create feet, giving the sculpture added balance and stability. For added detail, use a toothpick or small sculpting tool to define toes or claws, ensuring they look natural and add character to your piece.
Tail
The tail can add both balance and a dynamic look to your sculpture. Roll a long cone of clay, tapering one end to form a smooth, natural shape. Attach the thicker end to the back of the body, ensuring a firm connection by blending the clay at the joint with your fingers or a tool. For a more lifelike appearance, curve or lift the tail slightly to give your sculpture a sense of motion or personality.
Distinctive Features
Distinctive features like plates, horns, or frills can bring out the uniqueness of your dinosaur sculpture. Roll small shapes of clay for each feature, such as triangles for plates or rounded cones for horns. Press these features carefully into place on the head, back, or body, depending on the design of your dinosaur. Use a tool to blend the edges of the features into the base clay, ensuring they are secure and seamlessly integrated into the sculpture.
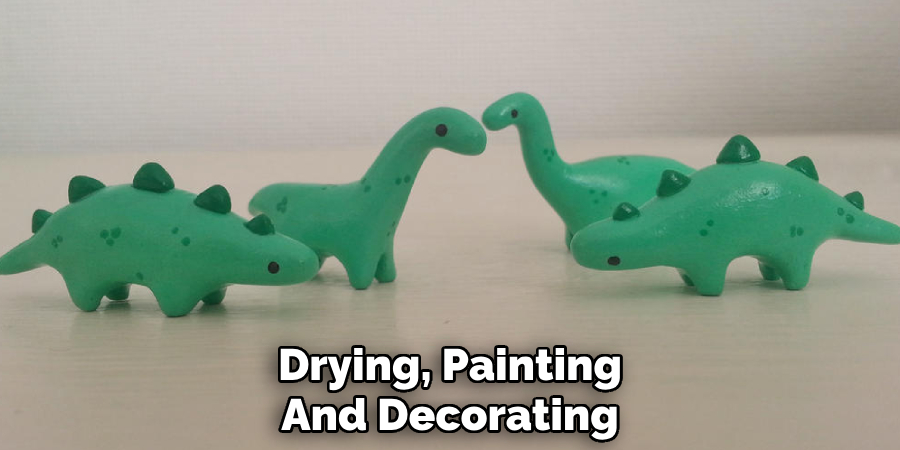
Drying, Painting, and Decorating
Drying
Once your dinosaur sculpture is complete, it’s important to allow the clay to dry properly to ensure durability. If you’ve used air-dry clay, place the sculpture in a dry, well-ventilated area and allow it to sit undisturbed for 24–48 hours. For creations made with polymer clay, refer to the manufacturer’s baking instructions, which typically recommend baking at a low temperature (around 250°F or 120°C) for 15–30 minutes, depending on the thickness of your sculpture. Be sure to monitor the baking process carefully to avoid overbaking.
Painting Your Dinosaur
For vibrant and lasting colors, use acrylic paint when decorating your dinosaur. Start by applying a solid base coat to cover the entire sculpture and allow this layer to dry thoroughly. Once the base coat is set, use smaller brushes to add intricate details such as spots, stripes, scales, or other patterns that bring your dinosaur to life.
Optional Additions
To give your dinosaur sculpture a personal and playful touch, consider adding fun extras. Googly eyes, glitter, or small fabric accessories can make your creation unique and whimsical. For added shine and protection, apply a clear sealant over the paint once it has dried completely. This finishing step will not only protect your artwork but also give it a polished, professional look.
Tips for Kids and Group Activities
Creating dinosaur sculptures can be an exciting activity for kids and groups when approached with a little organization and creativity! For younger children, use larger pieces and avoid incorporating too many small parts to ensure safety and ease of handling. For toddlers, pre-rolling parts, such as legs or tails, allows them to simply assemble their dinosaurs, mastering shapes and placement.
Turn this craft into a classroom or party project by assigning different dinosaur types or colors to each participant, fostering teamwork and individual expression. To take things even further, encourage kids to experiment with mixing colors, designing hybrid dinosaur species, or contributing to a larger group project like a dinosaur diorama. Providing an open-ended creative space ensures fun for all ages while sparking imagination and teamwork.
Conclusion
Creating these fun and imaginative dinosaurs is a rewarding activity that combines creativity with hands-on learning. The process is simple and engaging: gather all the necessary materials, choose your favorite dinosaur, shape and assemble the pieces, and finally decorate to bring your creation to life.
The joy of exploring “how to make dinosaur with clay” lies in the opportunity to experiment with different clay types and dinosaur designs, making each project unique. Encourage future projects to expand on these ideas, fostering creativity and curiosity. This activity not only teaches artistic expression but also sparks a love for crafting and discovery.
Specialization:
- Master of wheel-throwing, hand-building, and advanced glazing techniques
- Focus on creating both functional pottery and decorative art pieces
Recognition:
- Celebrated by collectors and art enthusiasts for creating one-of-a-kind pieces that blend artistry with functionality
- Participates in local and national exhibitions, earning accolades for his innovative designs and craftsmanship
Passion:
- Deeply committed to exploring and pushing the boundaries of ceramic artistry
- Continuously experiments with new materials, firing techniques, and artistic concepts to evolve his craft
Personal Philosophy:
- Believes in the transformative power of art, aiming to evoke emotions and connections through his ceramic creations
- Advocates for sustainability in ceramics, using eco-friendly materials and practices whenever possible