


Dreamy ceramics embody the art of creating elegant, smooth, and visually captivating pieces that exude charm and sophistication. These ceramics often feature soft glazes, intricate details, or ethereal textures that make them truly one of a kind. The allure of making dreamy ceramics lies in their ability to offer a sense of artistic expression, allowing each piece to tell its own unique story. Handmade ceramics add a personalized touch to any space, making them not only functional but also beautiful works of art.

This article will serve as a comprehensive guide on how to make dreamy ceramics, covering the essential steps from selecting materials and shaping techniques to glazing and firing your pieces for a professional, polished finish. Whether you’re a beginner or an experienced artist, this guide aims to inspire your creativity and help you bring your ceramic dreams to life.
Gathering Materials and Tools
Creating beautiful ceramics starts with gathering the right materials and tools. Selecting the appropriate clay is crucial as it serves as the foundation of your project. Porcelain is ideal for achieving a smooth, delicate finish, while stoneware is valued for its durability and versatility. For a more rustic and earthy aesthetic, earthenware is an excellent choice. Regarding glazes, options such as matte, glossy, transparent, or soft pastel shades can help you achieve a dreamy and personal aesthetic.
Tools play an equally important role in the ceramic-making process. A pottery wheel is a must for wheel-thrown ceramics, though it’s optional for hand-building projects. Essential hand-building tools include a rolling pin, wire cutter, and wooden modeling tools to shape and manipulate the clay. Sponges, ribs, and smoothers are indispensable for refining and perfecting each piece. Finally, a kiln is required for firing your ceramics, although alternative methods such as raku or pit firing can add unique textures and character to your work. Proper preparation with high-quality materials and tools will set the stage for success, making bringing your creative visions to life easier.
Choosing the Right Clay for Dreamy Ceramics
Selecting the appropriate type of clay is essential to achieving the desired outcome for your ceramic creations. Three common types of clay each offer unique properties, making them suitable for different styles and purposes.
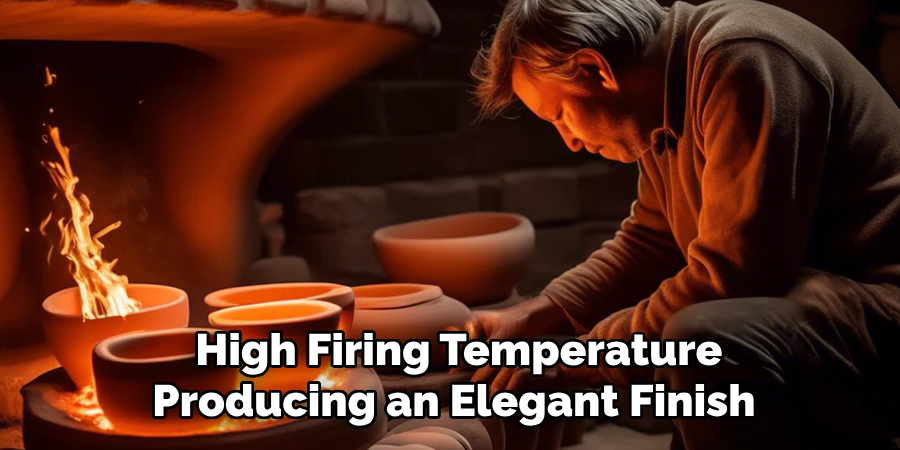
Porcelain Clay is an excellent choice for creating delicate, fine, and translucent pieces. It is renowned for its smooth texture and high firing temperature, producing an elegant finish. However, it can be challenging to work with because it tends to be less forgiving and more prone to cracking.
Stoneware Clay stands out for its versatility and strength, making it ideal for crafting everyday functional ceramics, such as dishes or mugs. It has a medium-to-high firing temperature and offers a durable, dense result, often with a slightly earthy appeal.
Earthenware Clay is perfect for decorative or textured ceramics. Softer and more porous than other clays, it fires at a lower temperature, resulting in a rich, warm finish. It’s ideal for vibrant glazes and experimental designs.
Once you select the suitable clay, proper preparation is crucial. Begin by kneading, also known as wedging, to remove air bubbles and ensure a uniform consistency. This step ensures workability and minimizes the risk of imperfections when shaping and firing your ceramic pieces.
How to Make Dreamy Ceramics: Shaping Techniques for a Soft, Elegant Look
Wheel-Throwing Method
The wheel-throwing technique is revered for its ability to create smooth, flowing forms that exude elegance and precision. Begin by centering your clay on the wheel, a foundational step that ensures balance and symmetry in your piece. Gradually and carefully, pull up the clay walls while maintaining steady pressure, allowing the shape to develop naturally. The use of ribs and sponges is essential during this stage to refine the form, remove excess moisture, and achieve the delicate, airy appearance synonymous with wheel-thrown ceramics. This method is ideal for crafting lightweight bowls, graceful vases, and other soft, curved designs.
Hand-Building Method
Hand-building offers a more organic and tactile approach to shaping your ceramics, creating unique and artistic pieces. Pinch pottery is a versatile method perfect for creating soft, rounded shapes with natural, organic textures. Slab building, however, allows for clean, minimalistic aesthetics, ideal for modern designs. By joining carefully cut slabs of clay, you can craft geometric forms with smooth surfaces. Coiling, another age-old technique, involves layering rolled strands of clay to build up the shape, imparting intriguing textures and a dreamy, flowing look. Coiling works beautifully for sculptural pieces or distinctive surface patterns.
Tips for Soft, Even Textures
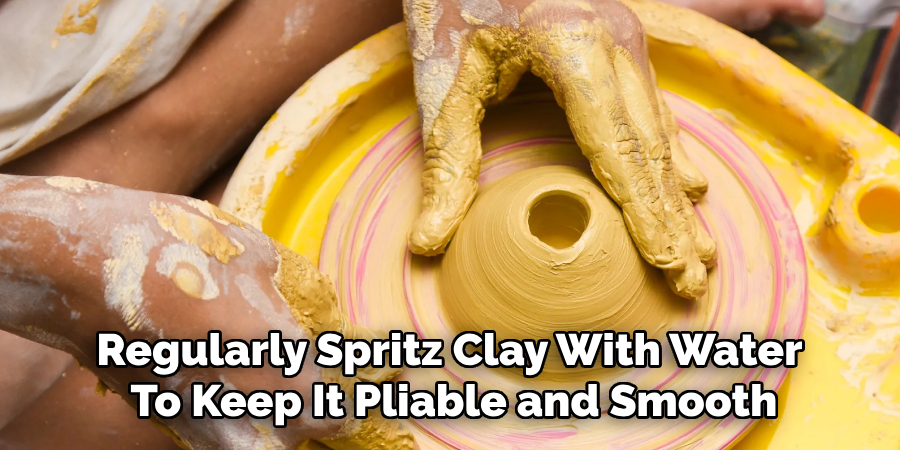
Whether using the wheel or hand-building, maintaining a consistent texture is key for achieving an elegant result. Regularly spritz clay with water to keep it pliable and smooth out imperfections as you work. Use flexible tools and gentle pressure to avoid disturbing your forms’ natural softness and flow. You can craft ceramics that embody a refined, graceful aesthetic through careful attention and technique.
Smoothing and Refining the Surface
Achieving a silky, polished finish on your ceramics requires carefully using tools like sponges and ribs. Start by using a slightly damp sponge to gently smooth the surface of your piece, removing any minor bumps or uneven areas. This step helps create a seamless base while maintaining the integrity of your design. Flexible metal or rubber ribs are invaluable tools for refining the surface further, as they glide effortlessly over the clay, leaving a clean, cohesive texture.
For adding soft textures without introducing harsh edges, consider using natural sponges or textured materials with light, circular motions to imprint subtle patterns. These techniques allow for delicate detailing while preserving the piece’s harmony and balance. Remaining gentle during this step is important to avoid marring the clay’s surface.
Once your piece reaches the leather-hard stage—when the clay is firm but still slightly pliable—it is the ideal time for final refinements. At this stage, you can smooth out any remaining imperfections, sharpen details, and ensure all edges are soft and consistent. By practicing patience and precision, you can elevate your ceramics with professional and polished aesthetic surfaces.
Glazing and Decorating for a Dreamy Aesthetic
Choosing the Right Glaze
Selecting the perfect glaze can significantly elevate the appearance of your ceramic piece. Consider soft pastel or milky white glazes for an ethereal and dreamy look. These shades create a serene and elegant aesthetic that is effortlessly captivating. Alternatively, transparent glazes work splendidly to showcase the natural textures of the clay beneath, allowing their organic beauty to shine through.
Application Techniques
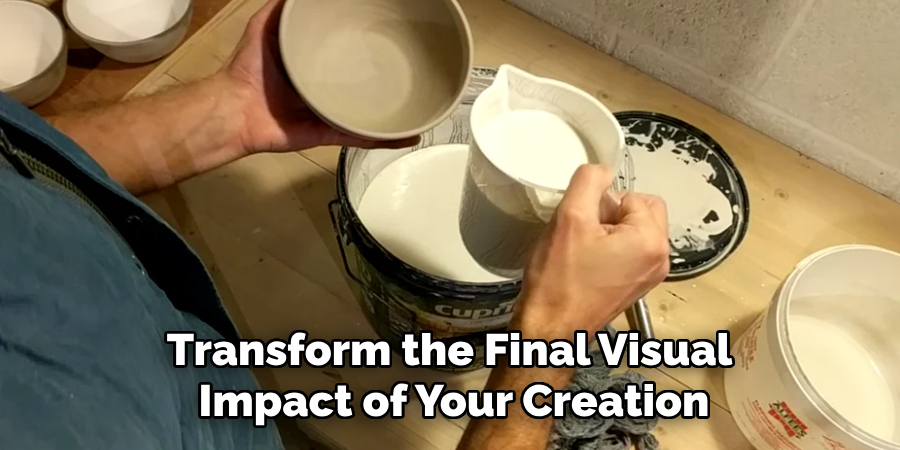
How gthe laze is applied can transform the final visual impact of your creation. Popular techniques include dipping, brushing, or spraying to achieve an even and smooth coverage. Placing different glazes can create depth, softness, and dynamic color variations for added visual interest. Experimenting with these methods allows for unique and personalized results in every piece.
Decorative Elements
To enhance the dreamy aesthetic further, incorporate decorative elements that offer subtle yet enchanting details. Carving or embossing designs into the surface prior to glazing creates delicate patterns that are highlighted when the glaze settles into these grooves. Additional touches, such as gold luster or iridescent finishes, can provide a striking, magical quality to your ceramics. These final flourishes create a breathtaking interplay of texture and light, ensuring your piece exudes charm and sophistication.
Firing Techniques for a Dreamy Finish
Firing is a critical aspect of ceramics that transforms raw clay into durable, timeless pieces and allows for stunning decorative finishes. Here are some common firing techniques that can help shape your artistic vision:
Bisque Firing
This is the first firing process that prepares the clay for glazing. By hardening the clay at relatively low temperatures, bisque firing removes all moisture and leaves the piece porous. This makes it easier to apply glazes evenly and ensures the durability of the final product.
Glaze Firing
Glaze firing is what gives ceramics their characteristic smooth, glassy surface. The applied glaze melts and fuses to the clay body under high heat, creating a functional and decorative finish. The firing temperature and atmosphere directly impact the results, offering endless possibilities.
Alternative Firing Methods
For those seeking unique and unpredictable effects, alternative methods are worth exploring. Raku Firing involves rapidly firing pieces before cooling them in combustible materials, producing distinctive smoky patterns and crackled surfaces. Pit Firing, on the other hand, uses organic materials like sawdust and wood, creating earthy textures and captivating, primal aesthetics. These techniques offer a raw, artistic charm in any collection.

Final Touches and Care for Handmade Ceramics
The final steps in creating beautiful handmade ceramics involve polishing edges and adding intricate decorative details. Use fine sandpaper to smooth out any rough edges once the piece is fully cooled, ensuring a comfortable and refined finish. For decorative touches, consider hand-painting or applying subtle glazes to enhance the aesthetic appeal.
After firing, ceramics should cool gradually to prevent cracking or warping caused by rapid temperature changes. Allow pieces to reach room temperature before handling them extensively.
To care for handmade ceramics, always wash them gently with warm, soapy water and avoid using harsh abrasives that could damage the surface. To prevent stress fractures, handmade ceramics should not be exposed to sudden or extreme temperature changes, such as pouring boiling liquid into a cold ceramic mug. Proper care ensures your unique ceramic pieces remain beautiful and functional for years to come.
Conclusion
Creating handmade ceramics is a rewarding process that involves key steps such as choosing the right clay, shaping your piece, refining details, applying glazes, and firing with care. Understanding “how to make dreamy ceramics” unfolds as you explore experimenting with colors, textures, and shapes, crafting truly personalized designs. This creative journey encourages beginners and experts to express their individuality through each creation. Remember, the ultimate tip is to take your time, enjoy the process, and refine your techniques with each new piece. Doing so’ll bring your ceramic dreams to life, one unique creation at a time.
Specialization:
- Master of wheel-throwing, hand-building, and advanced glazing techniques
- Focus on creating both functional pottery and decorative art pieces
Recognition:
- Celebrated by collectors and art enthusiasts for creating one-of-a-kind pieces that blend artistry with functionality
- Participates in local and national exhibitions, earning accolades for his innovative designs and craftsmanship
Passion:
- Deeply committed to exploring and pushing the boundaries of ceramic artistry
- Continuously experiments with new materials, firing techniques, and artistic concepts to evolve his craft
Personal Philosophy:
- Believes in the transformative power of art, aiming to evoke emotions and connections through his ceramic creations
- Advocates for sustainability in ceramics, using eco-friendly materials and practices whenever possible