


Are you bored with your old and outdated ceramic tile countertops? If so, why not give them a fresh new look by painting them?

Painting ceramic tile countertops is an affordable and effective way to refresh and modernize your kitchen or bathroom without needing a complete renovation. With the proper preparation, materials, and techniques, you can transform dated or worn-out tile into a durable, stylish surface that complements your space.
Additionally, painting your ceramic tile countertops allows for endless customization options, allowing you to create a unique and personalized look.
This guide on how to paint ceramic tile countertops will walk you through the essential steps to ensure a successful and long-lasting finish, from cleaning and priming to selecting the perfect paint and applying a protective topcoat. Let’s get started!
What Are the Benefits of Painting Ceramic Tile Countertops?
Aside from being a budget-friendly alternative to replacing your countertops, painting ceramic tiles has many other benefits.
- Cost-effective: As mentioned, painting your ceramic tile countertops is significantly less expensive than ripping them out and installing new ones. Depending on the size of your countertop, you can complete this project for under $100.
- Easy and Quick: Painting ceramic tile countertops is relatively simple and requires little time or effort compared to other home improvement projects. You can transform your countertops on a weekend with proper preparation and technique.
- Versatile: Painting allows you to create a custom look that suits your style and complements your decor. You can choose from various colors, patterns, and finishes to achieve the desired effect.
- Durable: When done correctly and with the right materials, painted ceramic tile countertops can last for years without chipping or peeling. They are also resistant to stains and heat, making them ideal for high-traffic areas such as kitchens and bathrooms.
Now that you know the benefits of painting ceramic tile countertops, let’s dive into the step-by-step process.

What Will You Need?
Before you begin, gather all the necessary materials and tools to ensure a smooth and efficient painting process. Here’s a list of what you’ll need:
- Cleaning supplies (dish soap, vinegar, water)
- Sandpaper or liquid sander
- Painter’s tape
- Primer suitable for ceramic surfaces
- Acrylic or epoxy paint in your desired color
- Paintbrushes or rollers
- Protective topcoat (polyurethane or acrylic sealant)
Some additional items that may come in handy include drop cloths, gloves, and a face mask.
8 Easy Steps on How to Paint Ceramic Tile Countertops
Step 1: Clean the Surface Thoroughly
Before painting, it’s crucial to start with a clean surface to ensure the paint adheres properly and achieves a smooth finish. Begin by removing any dirt, grease, or debris from the tile countertops using dish soap and warm water. A sponge or soft cloth can help scrub away grime without scratching the tiles. If there are tougher stains or buildup, create a stronger cleaning solution by mixing equal parts vinegar and water.
For particularly stubborn spots, a mild abrasive cleaner can work wonders. Once the countertops are visibly clean, rinse the surface thoroughly with water to remove any residue. Allow the surface to dry completely before moving on to the next step, as moisture can interfere with the adhesion of both the primer and paint.
Step 2: Sand the Tile Surface
To ensure the paint adheres properly, lightly sand the tile surface using fine-grit sandpaper (around 220 grit). This process removes any glossy finish or sealant and creates a slightly rough texture for the primer and paint to grip. Be sure to sand evenly across all tiles, particularly to edges and grout lines.
After sanding, wipe down the entire surface with a damp cloth to remove any dust or residue. Allow the surface to dry completely before proceeding to the next step.
Step 3: Apply a Primer
Applying a high-quality primer ensures the paint adheres well and lasts over time. Choose a primer that is specifically designed for tile or glossy surfaces. Using a brush or roller, evenly coat the entire surface with the primer, covering all grout lines and edges.

Allow the primer to dry completely, following the manufacturer’s recommended drying time, before moving on to the painting stage. Proper priming helps create a solid, durable base for your paint.
Step 4: Paint the Tiles
Once the primer has fully dried, it’s time to apply the paint. Select a high-quality paint suitable for tile surfaces, such as epoxy or enamel paint, which offers durability and resistance to moisture. Using a brush or roller, apply the paint in thin, even coats, working carefully to cover the entire surface, including grout lines and edges.
Allow each coat to dry thoroughly per the paint manufacturer’s instructions before applying additional coats. Two to three coats are recommended for optimal coverage and a smooth, professional finish. Take time to ensure even application, as this will significantly impact the final result.
Step 5: Seal the Painted Tiles
After the paint has completely dried and you are satisfied with the coverage, it is crucial to apply a clear sealant to protect the surface and ensure longevity. Choose a sealant compatible with the type of paint you used, such as a water-based polyurethane or a tile-specific topcoat.
Using a clean brush or roller, evenly apply the sealant across the entire surface, including the grout lines, to create a protective barrier against moisture, stains, and wear. Allow the sealant to dry fully according to the manufacturer’s guidelines, and apply additional coats if needed for added durability. This final step helps preserve the beauty of your painted tiles and provides a long-lasting finish.
Step 6: Maintain Your Painted Tiles
Properly maintaining your painted tiles is essential to keep them pristine and prolong their lifespan. Clean the tiles regularly using a soft cloth or mop and a mild, non-abrasive cleaner that is safe for painted surfaces. Avoid harsh chemicals, abrasive scrubbers, or heavy-duty cleaning tools that could damage the paint or sealant.
If you notice any chips or scratches over time, promptly touch the affected areas with matching paint and reseal as necessary. With consistent care and attention, your freshly painted tiles will remain a beautiful and durable space feature.
Step 7: Enjoy Your Revitalized Space
Now that your painted tiles are complete take a moment to admire the transformation they’ve brought to your space. Whether you’ve opted for a bold, vibrant pattern or a subtle, minimalist update, the results will surely enhance the area’s aesthetic and ambiance. Not only do freshly painted tiles breathe new life into your home, but they also serve as a testament to the creativity and effort you’ve invested in personalizing your environment.

Remember, maintaining the beauty and durability of your tiles involves more than just cleaning—regular inspections and promptly addressing any wear or imperfections will help preserve their charm for years to come. Invite friends or family to see your work, and perhaps even inspire others to take on creative home improvement projects of their own. This project revitalized your space and demonstrates the rewarding impact of dedication and craftsmanship.
Step 8: Share Your Project
Once you’ve completed your tile-painting project and are enjoying the results, why not share your success? Take before-and-after photos to showcase the transformation and inspire others looking to update their spaces. Share your experience on social media, home improvement forums, or with friends and family.
Your project can motivate others to take on creative DIY adventures, and you can exchange tips and ideas with a community of fellow enthusiasts. Sharing your project adds more fulfillment to your hard work and promotes a sense of pride in your achievement.
By following these simple steps and using the right tools and materials, transforming your old or outdated tiles into a stunning home feature is well within reach.
5 Things You Should Avoid
- Skipping Proper Cleaning: Failing to thoroughly clean the ceramic tiles before painting can lead to poor adhesion and an uneven finish. Dirt, grease, and grime must be removed to ensure the paint sticks properly.
- Ignoring Primer Application: Not using a suitable primer before painting can cause the paint to peel or chip over time. Always apply a primer designed for glossy or tiled surfaces to create a strong base.
- Using the Wrong Paint: Regular wall paint is unsuitable for ceramic tile countertops. Opt for specialty paints, such as epoxy or tile paint, that are durable and formulated for such surfaces.
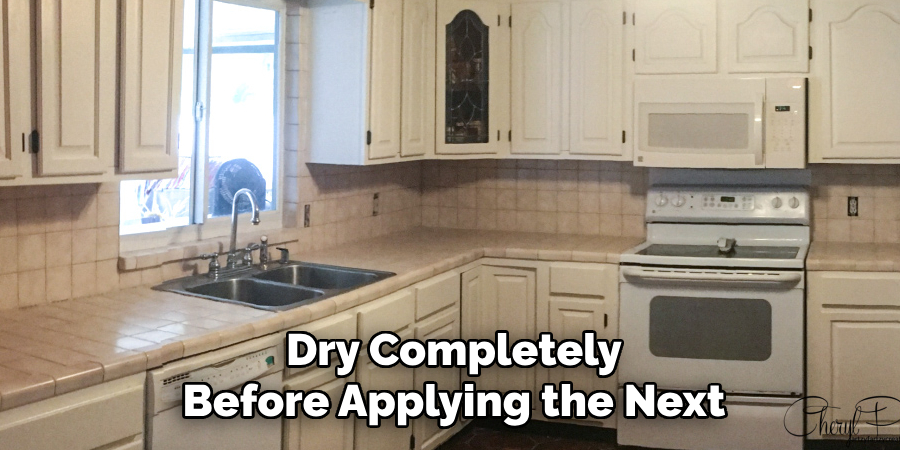
- Rushing the Drying Time: Skipping or rushing the drying time between coats can result in a messy and uneven finish. Be patient and allow each layer to dry completely before applying the next.
- Neglecting a Protective Sealer: Forgetting to apply a clear protective sealer post-painting can leave your countertops vulnerable to scratches, stains, and wear. A sealer will provide extra durability and maintain the finish for longer.
Conclusion
How to paint ceramic tile countertops can be an effective and budget-friendly way to refresh your space, but it requires proper preparation and attention to detail.
You can achieve a durable and attractive finish by following the outlined steps and avoiding common mistakes such as skipping primer, using the wrong paint, or neglecting a protective sealer.
With patience and the right materials, your painted countertops can transform the look of your kitchen or bathroom while standing up to everyday use.
Specialization:
- Master of wheel-throwing, hand-building, and advanced glazing techniques
- Focus on creating both functional pottery and decorative art pieces
Recognition:
- Celebrated by collectors and art enthusiasts for creating one-of-a-kind pieces that blend artistry with functionality
- Participates in local and national exhibitions, earning accolades for his innovative designs and craftsmanship
Passion:
- Deeply committed to exploring and pushing the boundaries of ceramic artistry
- Continuously experiments with new materials, firing techniques, and artistic concepts to evolve his craft
Personal Philosophy:
- Believes in the transformative power of art, aiming to evoke emotions and connections through his ceramic creations
- Advocates for sustainability in ceramics, using eco-friendly materials and practices whenever possible