


Are you tired of the same old look of your ceramic wall cladding? Want to give it a fresh and new appearance without spending much money on replacing it?
How to paint ceramic wall cladding can be an excellent way to refresh and modernize your space without the effort and expense of replacing the tiles. This process allows you to achieve a personalized look while preserving the durability and practicality of ceramic surfaces.
However, painting ceramic cladding requires proper preparation, the right tools, and suitable paint to ensure a smooth, professional finish that lasts. Additionally, following the correct techniques can help prevent the paint’s peeling or chipping over time.
With the right approach, you can transform your ceramic surfaces and give your space a new aesthetic.
What Are the Benefits of Painting Ceramic Wall Cladding?
Painting ceramic wall cladding can bring numerous benefits, such as:
- Cost-effective: As mentioned earlier, painting is a budget-friendly alternative to replacing the tiles altogether. It allows you to achieve a new look without breaking the bank.
- Versatile: With paint, you have endless color and design options. Customize your ceramic wall cladding to match your taste and current interior style.
- Easy Maintenance: Painted ceramic surfaces are easy to clean and maintain. Unlike grout lines on tiled walls that can easily collect dirt and grime, painted surfaces have a smooth finish that is effortless to keep clean.
- Durable Finish: While some may assume that paint on ceramic surfaces would not last long, the truth is that when done correctly, painted wall cladding can have a durable finish that can withstand water, steam, and mildew.
- Quick Solution: Painting ceramic wall cladding is the perfect solution if you want a fast way to transform your space. It’s a relatively simple process that can be completed in a day or two, depending on the size of your project.
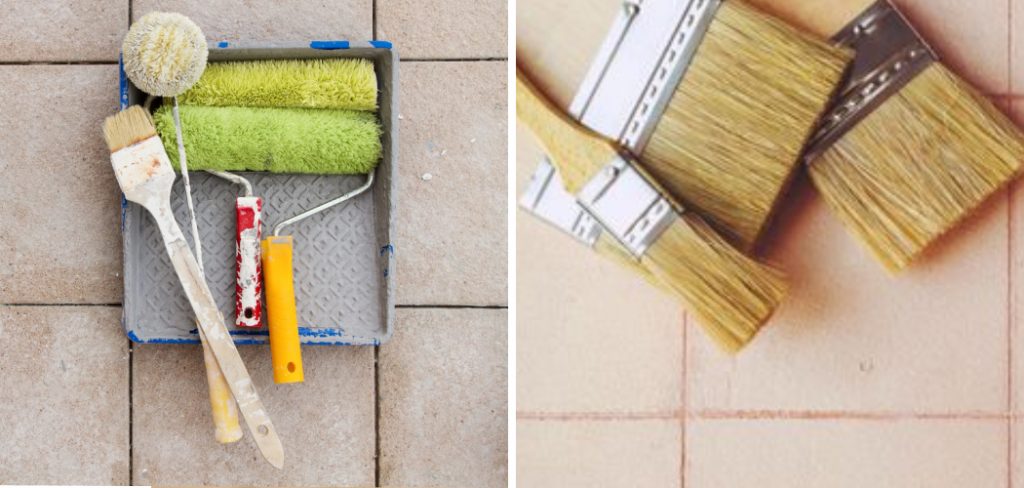
What Will You Need?
Before starting your project, gather the following materials and tools:
- Sandpaper: To ensure proper paint adhesion to the ceramic surface, use fine-grit sandpaper (around 220 grit) to sand the tiles lightly.
- TSP Cleaner or Degreaser: This cleaner removes dirt, grime, or oil from the tiles. Make sure to follow the manufacturer’s instructions when using it.
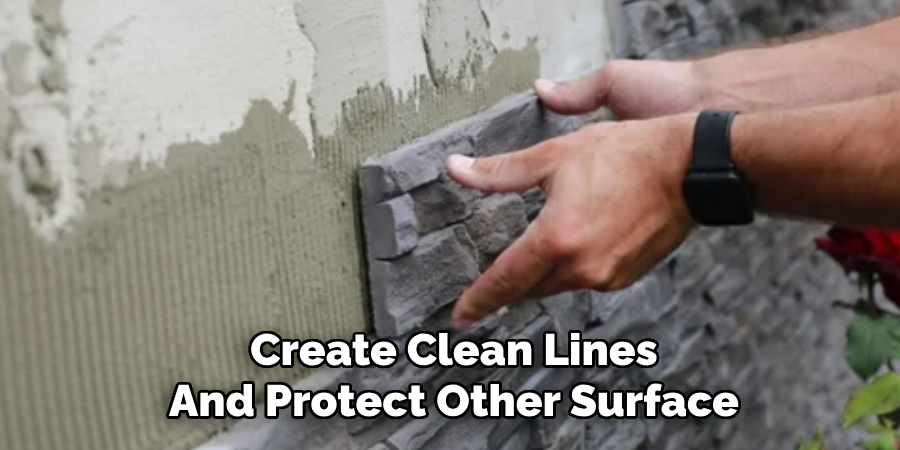
- Painter’s Tape: This will help you create clean lines and protect other surfaces from paint splatters.
- Primer: A high-quality bonding primer designed for tiles must ensure the paint adheres properly and lasts longer.
- Paint: Choose a high-quality paint suitable for ceramic surfaces. Acrylic or epoxy paint are popular choices.
- Paintbrushes and Rollers: Use a brush to cut around edges and corners, while rollers are best for quickly covering large areas.
- Sealant: Once the paint is dry, seal it over the painted ceramic surface to protect it from moisture and wear.
10 Easy Steps on How to Paint Ceramic Wall Cladding
Step 1. Prepare the Area:
Start by cleaning the workspace where you’ll be painting. Lay down drop cloths or plastic sheeting to protect floors and nearby surfaces. Use painter’s tape to mask off edges, trim, or any areas you don’t want to paint.
Clean the tiles thoroughly using TSP cleaner or degreaser to remove any grease, dirt, or residue, and allow them to dry completely.
Step 2. Sand the Surface:
Using fine-grit sandpaper (around 220 grit), gently sand the ceramic surface to create a slightly rough texture. This step is crucial as it helps the primer and paint adhere better to the smooth ceramic finish. Work in small sections and sand evenly across the entire surface, avoiding rough spots or uneven patches.
After sanding, wipe down the tiles with a damp microfiber cloth to remove all dust and debris, then allow them to dry completely before proceeding to the next step. Proper surface preparation at this stage ensures a professional-looking and long-lasting result.
Step 3. Apply Primer:
Choose a high-quality bonding primer specifically designed for smooth surfaces like ceramic tiles. Using a paint roller or a high-quality brush, apply a thin and even coat of primer to the tiles. Ensure complete coverage, but avoid overloading the roller or brush, which can lead to drips or uneven texture.
Allow the primer to dry completely per the manufacturer’s instructions before moving on to the next step. Proper priming ensures the paint adheres effectively and provides a durable finish.
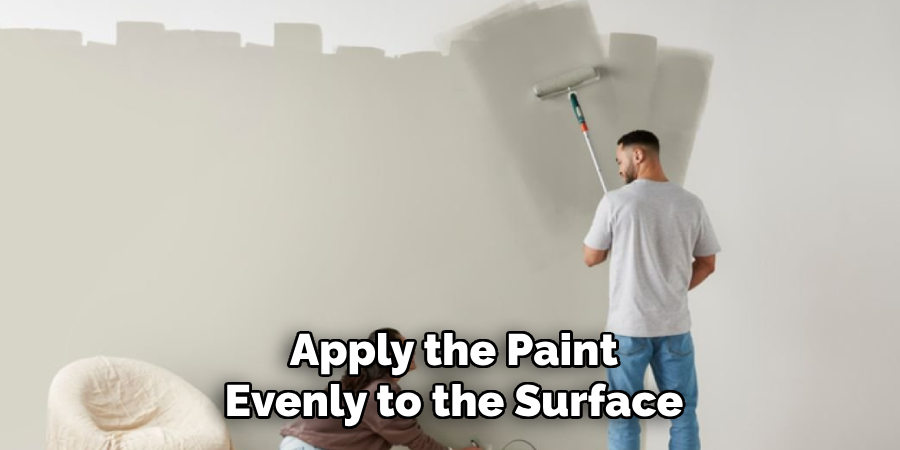
Step 4. Paint the Tiles:
Once the primer is completely dry, select a high-quality epoxy or tile-specific paint in your chosen color. Using a clean paint roller or brush, apply the paint evenly to the surface, starting with thin, consistent coats. Avoid overloading the roller or applying excessive paint, which can cause streaks or pooling.
Allow each coat to dry according to the manufacturer’s instructions before adding additional coats. Unlike a single thick layer, multiple thin coats typically provide a smoother and more durable finish. Take your time to ensure even coverage and a professional result. Trim edges carefully with a brush for a clean and flawless look.
Step 5. Seal the Paint:
Apply a clear, water-resistant sealant for tile surfaces to protect your painted tiles and enhance their durability. Applying the sealant in thin, even layers, using a clean brush or roller, ensures complete coverage. Allow the adhesive to dry thoroughly between coats, following the manufacturer’s instructions.
This final step will help safeguard against moisture, stains, and daily wear, ensuring your painted tiles maintain their appearance and finish over time.
Step 6. Maintain Your Painted Tiles:
Proper maintenance is essential to preserve the look and longevity of your painted tiles. Clean the surface regularly using a soft cloth or non-abrasive sponge with a mild, pH-neutral cleaner.
Avoid harsh chemicals, abrasive scrubbers, or excessive moisture, as these can damage the paint or sealant over time. Address any chips or scratches promptly by touching the affected area with leftover paint and sealant. With proper care, your painted tiles will continue to enhance your space for years.
Step 7. Enjoy Your Revitalized Space:
Once your painted tiles are complete and properly maintained, take the time to enjoy the transformation they bring to your space. Whether it’s a colorful backsplash, a decorative accent, or a refreshed floor, your painted tiles can add personality and charm to any room. Share your work with others, and take pride in your creativity and effort in this project.
Step 8. Plan for Future Projects:
Now that you’ve completed your painted tile project consider using your newfound skills for other creative endeavors. Whether it’s updating furniture, creating custom art pieces, or tackling another area of your home, the possibilities are endless.

Reflect on what you’ve learned during this process and use that experience to inspire future projects. With each new venture, your skills and confidence will continue to grow, making your home truly one of a kind.
Step 9. Try New Techniques and Designs:
Experiment with different painting techniques, patterns, or designs to create a unique and personalized look. Use stencils, sponges, or tape to add texture or dimension to your painted tiles. Consider using multiple colors or incorporating metallic accents for added interest. Have fun, and let your imagination run wild.
Step 10. Seek Professional Help if Needed:
While DIY projects can be gratifying, sometimes the expertise of a professional is necessary. If you encounter challenges such as uneven surfaces, persistent paint chipping, or designs requiring a specialist’s touch, don’t hesitate to ask for help.
Professional painters or tile experts can provide valuable advice, ensure high-quality results, and even help you bring complex ideas to life. Hiring a professional can save time and prevent costly errors, especially for large-scale projects. Remember, seeking assistance is not giving up—it’s an investment in achieving a polished, long-lasting result.
Following these steps and tips, you can successfully paint ceramic tiles and revitalize your space without needing a complete renovation.
5 Things You Should Avoid
- Skipping Surface Preparation: Failing to clean and properly prepare the ceramic surface can lead to poor paint adhesion. Permanently remove dirt, grease, and any residues before starting.
- Using the Wrong Type of Paint: Regular wall paint will not adhere properly to ceramic surfaces. Always use a paint specifically designed for non-porous surfaces like ceramics.
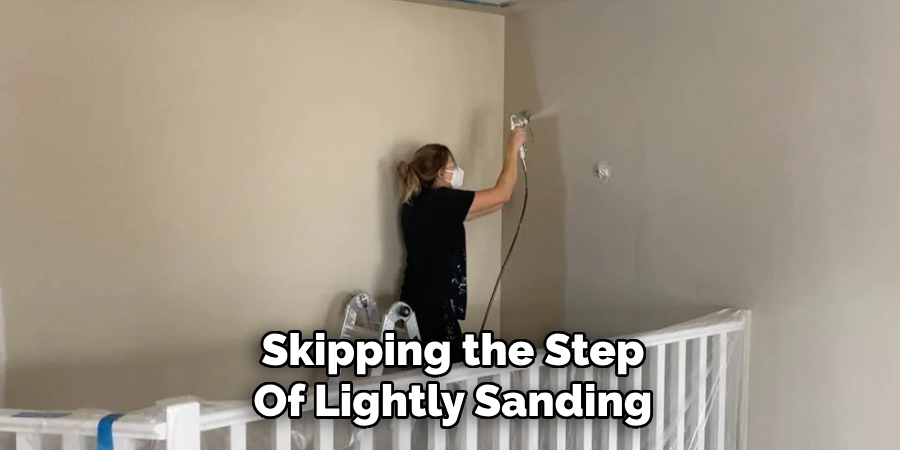
- Neglecting to Sand the Surface: Skipping the step of lightly sanding the ceramic cladding can result in a slick surface that paint cannot bond to. Sanding ensures better adhesion and a smoother finish.
- Avoiding a Primer: Applying paint directly to ceramic without using a high-quality primer designed for glossy surfaces can cause the paint to chip or peel over time.
- Rushing the Drying Process: Not allowing adequate drying time between coats can lead to uneven colors, peeling, and a subpar finish. Be patient and follow the drying time recommendations provided by the paint manufacturer.
Conclusion
How to paint ceramic wall cladding can be a rewarding project if proper steps are followed. The key to success lies in thorough preparation, including cleaning, sanding, and applying a suitable primer.
Using the correct type of paint designed for non-porous surfaces and adhering to recommended drying times ensures a durable and professional-looking finish. By avoiding common mistakes, such as skipping surface preparation or rushing the process, you can achieve a result that revitalizes your space and enhances the aesthetic of your ceramic cladding.
With patience and attention to detail, painting ceramic wall cladding is a manageable task that promises lasting satisfaction.
Specialization:
- Master of wheel-throwing, hand-building, and advanced glazing techniques
- Focus on creating both functional pottery and decorative art pieces
Recognition:
- Celebrated by collectors and art enthusiasts for creating one-of-a-kind pieces that blend artistry with functionality
- Participates in local and national exhibitions, earning accolades for his innovative designs and craftsmanship
Passion:
- Deeply committed to exploring and pushing the boundaries of ceramic artistry
- Continuously experiments with new materials, firing techniques, and artistic concepts to evolve his craft
Personal Philosophy:
- Believes in the transformative power of art, aiming to evoke emotions and connections through his ceramic creations
- Advocates for sustainability in ceramics, using eco-friendly materials and practices whenever possible