


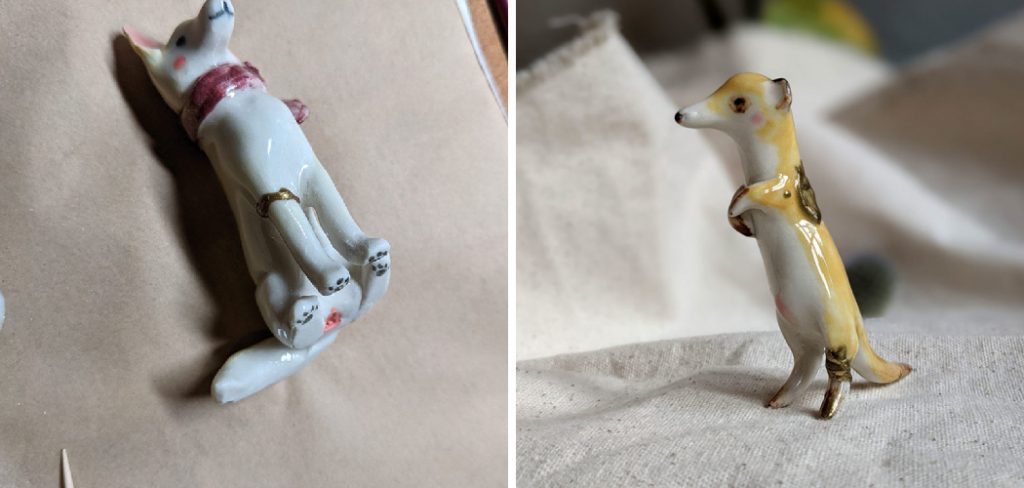
Porcelain figurines are delicate and often hold sentimental or monetary value, making it important to handle any damage with care. Whether it’s a small chip, a crack, or a broken piece, repairing porcelain figurines can restore their original beauty and ensure they last for years to come. With the right tools, materials, and techniques, even intricate repairs can be successfully completed at home.
This guide on how to repair porcelain figurines will walk you through the steps to fix your cherished porcelain pieces with confidence.
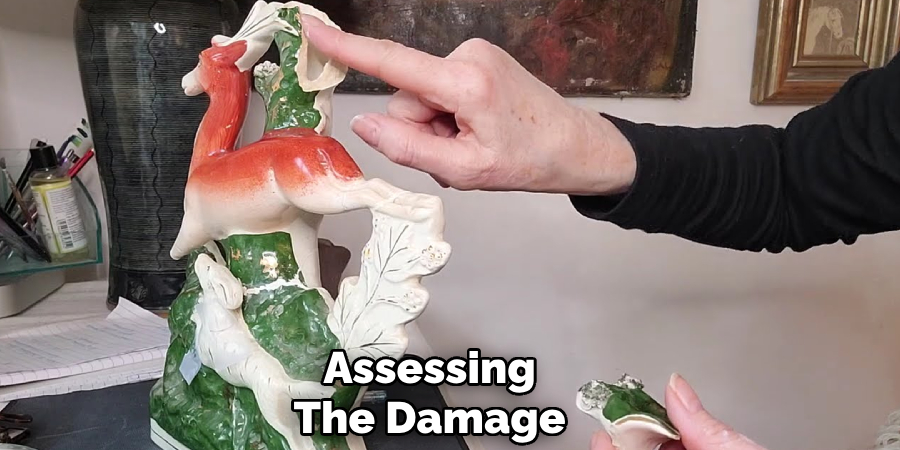
Assessing the Damage
Before starting any repair work, it’s crucial to carefully assess the extent of the damage to your porcelain figurine. Begin by examining the piece under good lighting to identify all cracks, chips, or missing fragments. Take note of the size, shape, and location of each damaged area. If there are multiple broken pieces, try to fit them together like a puzzle to ensure all parts are present.
This step will also help you determine whether the repair is feasible and what materials or tools you will need to complete the restoration. A thorough assessment lays the foundation for a successful repair and minimizes the risk of further damage during the process.
Tools and Materials Needed
Before beginning the repair process, gather all the necessary tools and materials to ensure efficiency and effectiveness. Here is a list of commonly required items:
Adhesive or Epoxy:
Choose a strong bonding agent suitable for the material being repaired.
Sandpaper:
Use fine-grit sandpaper to smooth edges and prepare surfaces for bonding.
Clamps or Supports:
These will help hold pieces securely in place while the adhesive sets.
Cleaner or Solvent:
Clean the surface thoroughly to remove dust, grease, or residue before starting the repair.
Paint or Finish (Optional):
For visible repairs, a touch-up with matching paint or finish can restore the item’s original look.
Safety Gear:
Gloves, goggles, or a mask may be necessary, depending on the materials being used.
Precision Tools (Optional):
Tweezers, small brushes, or applicators can help with detailed work.
Having these tools and materials ready will streamline the repair process and improve the overall outcome.
6 Simple Steps on How to Repair Porcelain Figurines
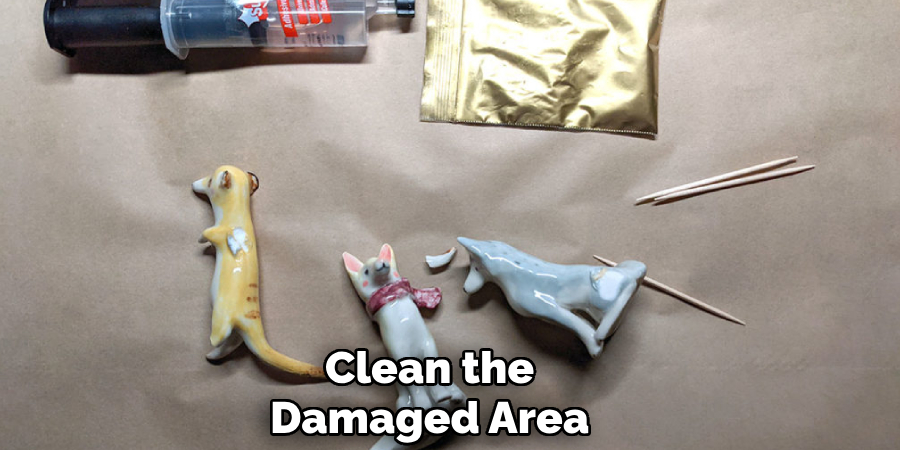
Step 1: Clean the Damaged Area
Begin by gently cleaning the damaged area to remove any dirt, dust, or debris. Use a soft, damp cloth or cotton swab dipped in water or a mild cleaning solution.
Ensure the area is completely dry before proceeding to the next step, as any moisture can interfere with the adhesive or repair materials. This step ensures a clean and smooth surface for better adhesion and a more seamless repair.
Step 2: Assess the Damage
Carefully examine the porcelain figurine to determine the extent of the damage. Identify all the broken pieces, chips, or cracks, and ensure you have all the fragments needed for the repair.
Arrange the pieces to see how they fit together, and note any areas that may require additional filling or reinforcement. This step is crucial for planning an effective repair and ensuring the figurine is restored as accurately as possible.
Step 3: Fill in Cracks or Chips
For cracks or missing chips, use a high-quality porcelain filler or epoxy suitable for delicate repairs. Apply the filler carefully using a fine tool or toothpick to ensure precision. Smooth out the filler with a damp cloth or your tool to create an even surface that aligns with the surrounding area.
Allow the filler to dry completely as per the product’s instructions before proceeding to the next step. Proper filling ensures the repaired figurine will have a smooth and cohesive appearance.
Step 4: Sand and Smooth
Once the filler has fully dried, gently sand the repaired areas to create a smooth, even surface. Use fine-grit sandpaper, such as 600-grit or higher, to carefully blend the edges of the filler with the surrounding porcelain. Be patient and apply light pressure to avoid damaging the original surface.
After sanding, wipe the figurine with a soft, damp cloth to remove any dust or residue. This step ensures the surface is prepared for painting or finishing, leaving the repaired area virtually unnoticeable.
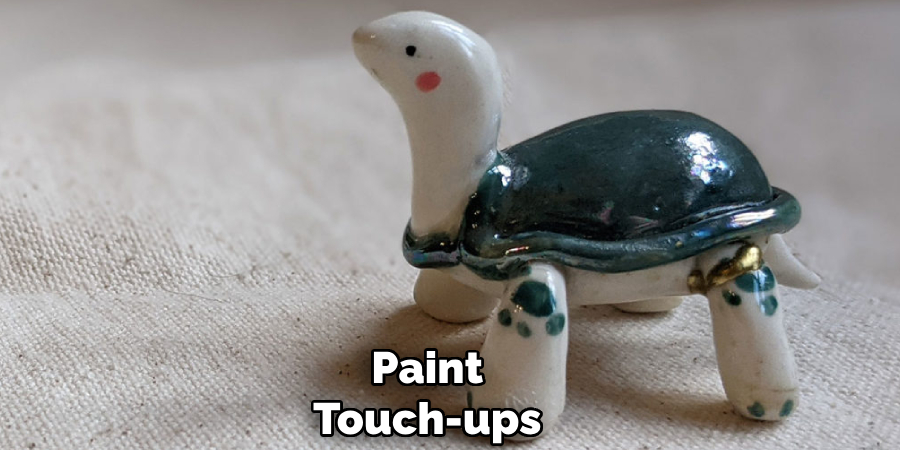
Step 5: Paint Touch-Ups
Once the surface is smooth and clean, it’s time to apply paint to restore the figurine’s original appearance. Choose high-quality, porcelain-compatible paint that matches the color and finish of the figurine. If necessary, mix colors to achieve the perfect match. Use a fine-tipped brush for precise application, especially in detailed areas or crevices.
Apply the paint in thin, even layers, allowing each coat to dry completely before adding the next. This gradual approach minimizes streaks and enhances the final finish. After painting, inspect the figurine under good lighting to ensure the repair seamlessly blends with the rest of the piece. Once fully satisfied, you can apply a clear, protective sealant for added durability and a polished look.

Step 6: Seal and Protect
After completing the painting and ensuring the repair blends seamlessly, it’s time to seal and protect the piece. Use a clear, high-quality sealant that is suitable for the material of the figurine. This will not only preserve the paintwork but also provide an additional layer of durability against wear and environmental factors. Apply the sealant in thin, even coats, using a soft brush or spray applicator if recommended. Allow the sealant to dry completely between coats, following the manufacturer’s instructions for drying times. Once finished, your figurine will have a polished, professional appearance and long-lasting protection.
Following these steps on how to repair porcelain figurines, you can also preserve the value and sentimental significance of your beloved collectibles. With proper care and maintenance, these delicate pieces can continue to be cherished for generations to come.
Additional Tips
- Use a magnifying glass or bright light to better see small details while repairing.
- If your figurine has intricate details that are too difficult to repair, consider taking it to a professional restoration expert.
- Store your repaired figurine carefully to prevent further damage. Avoid placing heavy objects on top of it or handling it roughly.
- If displaying your figurine, be sure to place it in a secure location where it won’t easily fall or get knocked over.
- Consider investing in a display case to protect and showcase your prized collectible.
Do You Need to Use Professionals?
Whether or not you need to seek professional help for repairing your figurines depends on the extent of the damage and your comfort level with do-it-yourself repairs. For minor cracks or chips, you might feel confident using tools like glue or filler at home. However, for more significant damage, such as broken limbs, missing parts, or intricate detailing, a professional restoration expert can provide the precision and expertise required to restore your figurine to its original condition.
Professional services often come with specialized techniques and materials that ensure a seamless repair, preserving the value and aesthetic of your collectible. If the figurine holds significant sentimental or monetary value, investing in professional restoration might be the best option to avoid accidental damage during a DIY attempt.
Preventing Future Damage
To prevent future damage to your figurines, it’s important to handle them with care and take proactive measures. Always wash your hands before handling collectible figurines to prevent oils or dirt from causing wear over time. Use a soft brush or cloth to gently clean them and avoid using harsh cleaning products that could damage delicate surfaces. Keep your figurines away from direct sunlight, as prolonged exposure can cause fading, discoloration, or warping.
Maintain a stable room temperature and humidity level to protect against cracking or other environmental damage. Periodically check your display area to ensure it remains secure and free from dust or debris that could pose a risk. By adopting these simple precautions, you can help preserve your figurines for years to come.
Frequently Asked Questions
Q1: Can I Clean My Figurines With Water?
A: It is not recommended to use water as it can cause damage to the delicate surface of your figurines. Instead, use a soft, dry cloth or brush to remove any dust or dirt.
Q2: How Often Should I Clean My Figurines?
A: It is recommended to clean your figurines every few months or whenever you notice a buildup of dust or grime. However, be gentle and avoid excessive handling as it can also cause damage.
Q3: Can I Display My Figurines Outside?
A: No, it is not advisable to display your figurines outside as they are meant for indoor use only. Exposure to outdoor elements can cause damage to the figurines, such as fading or cracking.
Q4: Are There Special Care Instructions for Ceramic Figurines?
A: Yes, ceramic figurines require extra care as they are fragile. Avoid using harsh chemicals, hot water, or abrasive materials when cleaning them. It is also important to handle them with care and avoid any sudden impacts or drops.
Conclusion
Proper care and handling of figurines are essential to preserving their beauty and longevity. By following the guidelines on how to repair porcelain figurines provided, such as keeping figurines indoors, cleaning them gently, and avoiding exposure to harmful elements, you can ensure they remain in excellent condition for years to come.
With the right attention and maintenance, your figurine collection can continue to bring joy and elegance to your space.
Specialization:
- Master of wheel-throwing, hand-building, and advanced glazing techniques
- Focus on creating both functional pottery and decorative art pieces
Recognition:
- Celebrated by collectors and art enthusiasts for creating one-of-a-kind pieces that blend artistry with functionality
- Participates in local and national exhibitions, earning accolades for his innovative designs and craftsmanship
Passion:
- Deeply committed to exploring and pushing the boundaries of ceramic artistry
- Continuously experiments with new materials, firing techniques, and artistic concepts to evolve his craft
Personal Philosophy:
- Believes in the transformative power of art, aiming to evoke emotions and connections through his ceramic creations
- Advocates for sustainability in ceramics, using eco-friendly materials and practices whenever possible