


Are you interested in learning how to sculpt with clay? Don’t worry, it’s not as difficult as it may seem!
Sculpting with clay is a timeless art form that allows individuals to express their creativity and bring their imaginations to life. It is a versatile medium that can be shaped, molded, and carved into intricate designs or bold, expressive forms. Whether you are a beginner exploring the basics or an experienced artist refining your technique, working with clay provides endless opportunities for artistic growth. Sculpting with clay is also a tremendous stress-relieving activity and can have therapeutic benefits.
This guide will introduce you to the fundamental tools, materials, and techniques needed to start your sculpting journey and create unique, handmade works of art. Let’s get started!
What Are the Benefits of Sculpting With Clay?
Sculpting with clay offers many benefits, making it a rewarding and enjoyable activity. Here are just a few:
- Unleash Your Creativity: Sculpting with clay makes your imagination run wild and brings your ideas to life in three-dimensional form.
- Develop Fine Motor Skills: Working with clay requires precise movements and delicate handling, which can improve dexterity and hand-eye coordination.
- Explore Different Techniques: There are various techniques for sculpting with clay, such as slab building, coil building, and carving, allowing you to experiment and find what works best for you.
- Physical and Mental Relaxation: The tactile nature of working with clay can be soothing, making it a tremendous stress-relieving activity.
- Sense of Accomplishment: Completing a sculpture from start to finish can give a sense of achievement and boost self-confidence.
What Will You Need?
Before you start your first sculpture, gathering all the necessary tools and materials is important. Here are some essential items you will need:
- Clay: Various types of clay are available, such as air-dry clay or oven-bake polymer clay. Choose the type that best suits your needs and budget.
- Sculpting Tools: These include a wire loop tool, needle tool, ribbon tool, and modeling tools for shaping and carving the clay.
- Workspace: Find a flat surface to work on with enough room for your materials. You can cover it with plastic or newspaper to protect it from mess.
- Water and Sponge: Keep a small container of water and a sponge nearby to keep the clay moist and smooth out imperfections.
- Finishing Tools: These include sandpaper, paint, brushes, glazes, and varnishes if you plan on adding color or finishing touches to your sculpture.
Once you have all your materials, it’s time to start sculpting!
8 Easy Steps on How to Sculpt With Clay
Step 1: Prepare Your Clay
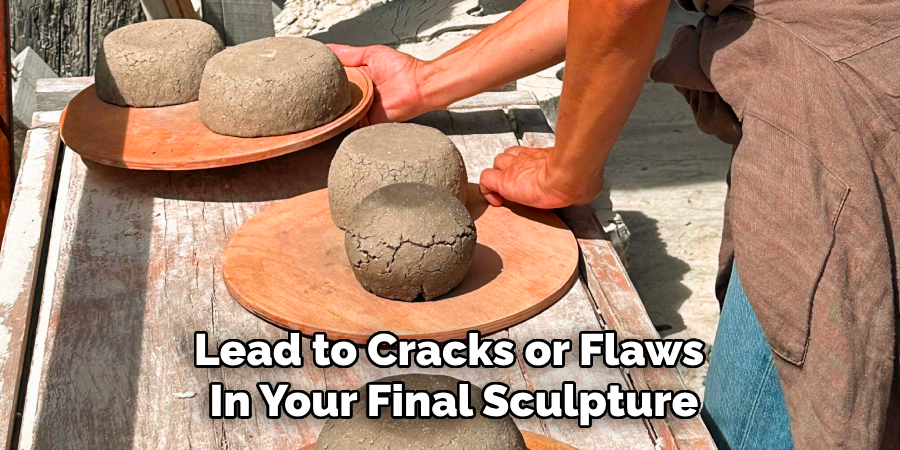
To prepare your clay, begin by kneading it thoroughly. Kneading, also known as conditioning, helps to ensure that your clay is soft, pliable, and free of air bubbles, which can lead to cracks or flaws in your final sculpture. Start by pressing and folding the clay with your hands, applying enough pressure to warm it up. If the clay feels too stiff, you can use a rolling pin or a clean, sturdy object to flatten and stretch it repeatedly until it achieves the desired consistency. This step is especially crucial for polymer clay, as it activates the binders within the material to make it workable.
Additionally, ensure that your working environment is clean and free from dust or debris that might get embedded in the clay. By taking your time with preparation, you’ll set a solid foundation for a smooth and successful sculpting process.
Step 2: Gather Your Tools
Before you begin shaping your clay, it’s essential to have all the necessary tools at hand. Common sculpting tools include various modeling tools such as wooden or metal shaping instruments, wire cutters, and a fine needle for adding detailed textures. You may also need a rolling pin for flattening, a knife for cutting, and sponges or brushes for smoothing and refining edges.
Having clean water nearby can be helpful if you’re working with water-based clay, as it keeps the material workable and prevents drying. Organizing your tools in advance will streamline your workflow and allow you to focus on bringing your creative vision to life.
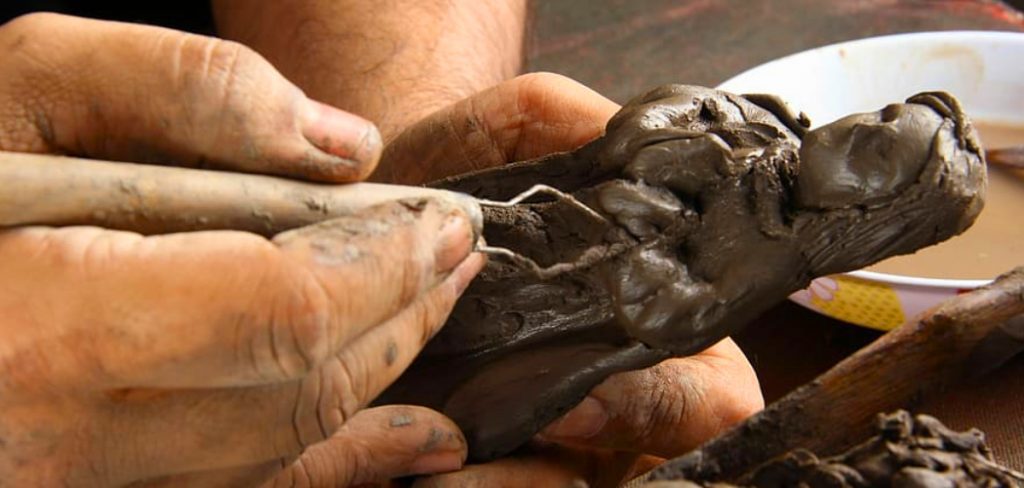
Step 3: Shape the Clay

Now that your tools are ready, it’s time to begin shaping the clay. Start by sketching or visualizing the design you want to create. Use your hands to mold the clay into the basic form of your sculpture, applying gentle pressure to build structure and volume. For more precise detailing, switch to your modeling tools to refine the shape and add textures, contours, or other intricate features. Remember to work slowly and methodically, as rushing can lead to uneven surfaces or unintended shapes.
If the clay starts to dry out during the process, use a damp sponge or brush to rehydrate it, allowing you to maintain its pliability as you sculpt. Shaping is often the most time-consuming step, yet it’s crucial for crafting a piece that truly reflects your artistic vision.
Step 4: Allow the Sculpture to Dry
Once you are satisfied with the shape and details of your sculpture, it’s essential to let it dry thoroughly. Place the sculpture in a cool, dry area away from direct sunlight or intense heat sources, as uneven drying can cause cracking or warping. The drying process can take anywhere from a few hours to several days, depending on the size and thickness of your piece and the type of clay used.
Patience is key during this step to ensure the piece dries uniformly and retains its structural integrity. Avoid handling the sculpture too much during this period to prevent accidental damage.
Step 5: Firing the Sculpture
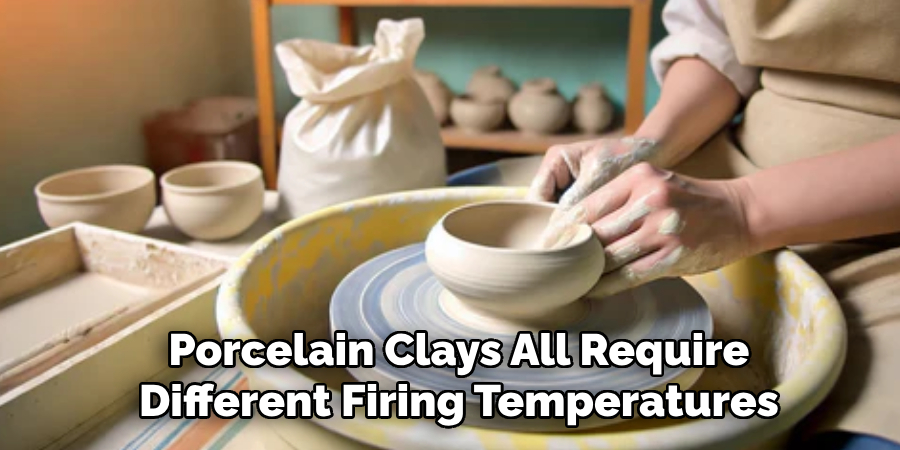
Once the sculpture has completely dried, the next step is firing it in a kiln to harden the clay and make it durable. Firing should be done according to the specific temperature requirements for the type of clay used. Stoneware, earthenware, and porcelain clays all require different firing temperatures, which the manufacturer typically provides. Carefully place the dried sculpture in the kiln, ensuring enough space around it for proper heat distribution.
Gradually increase the temperature to avoid thermal shock, which could cause the piece to crack. After the firing is complete and the kiln has cooled down, remove the sculpture carefully—it will now be transformed into a permanent, hardened form.
Step 6: Glazing the Sculpture
Glazing is an optional but advantageous step that can add color, texture, and a protective layer to your sculpture. Select a glaze compatible with the type of clay and firing temperature used. Carefully apply the glaze using a brush, dipping, or spraying technique, following the manufacturer’s guidelines for application. Be mindful of keeping the base of the sculpture glaze-free if it rests directly on the kiln shelf, as the glaze may fuse to it during firing.
Once the glaze has been applied and dried, the sculpture should be fired again in the kiln, this time at the appropriate temperature for the glaze to mature. This second firing will produce the final surface finish, leaving your sculpture with a beautiful, durable coat.
Step 7: Displaying and Preserving Your Sculpture
Once your sculpture is complete, it’s time to display your work proudly. Choose a location that highlights its features and complements its style—a shelf, pedestal, or dedicated area in your home or gallery. To preserve your sculpture, avoid placing it in areas with extreme temperatures, high humidity, or direct sunlight, as these conditions can cause cracking, fading, or other damage over time. Regularly dust the surface using a soft, dry cloth to maintain its appearance and ensure a long-lasting finish.
Step 8: Reflecting on Your Process and Growth
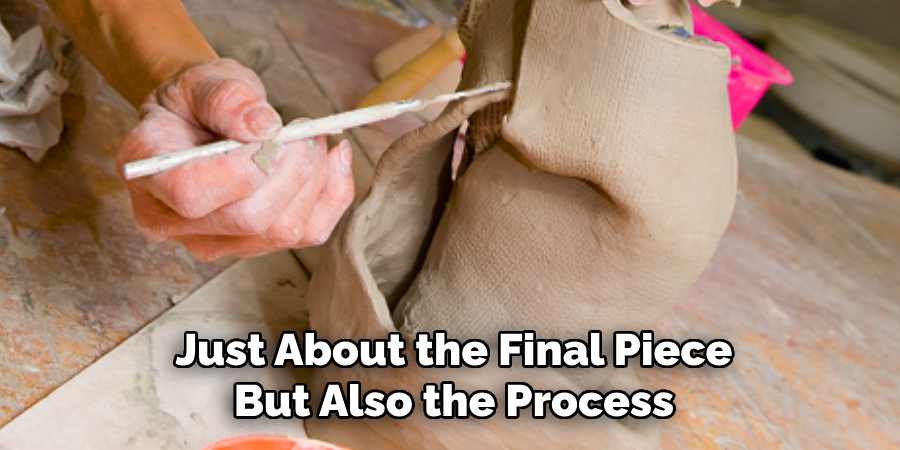
Creating a sculpture is not just about the final piece but also the process and the personal growth it brings. Take some time to reflect on the techniques you learned, the challenges you overcame, and the creativity you expressed throughout this journey. Consider documenting your process with notes or photos to help you improve your skills for future projects. Sharing your experience with others through social media, art communities, or exhibitions can also be a fulfilling way to celebrate your achievements and inspire others in their creative endeavors.
By following these steps, you can confidently embark on your sculpting journey and bring your ideas to life with clay.
5 Things You Should Avoid
- Using Too Much Water: While water is essential for keeping the clay malleable, adding too much can weaken its structure and make it challenging to work with. Use water sparingly and only when necessary.
- Rushing the Drying Process: Drying clay too quickly, whether by direct sunlight or intense heat, can lead to cracks and uneven surfaces. Allow your piece to dry naturally and evenly over time.
- Skipping Proper Wedging: Wedging the clay removes air bubbles and ensures uniform consistency. Failing to wedge appropriately can result in weak points or air pockets that cause problems during firing.
- Ignoring Tool Maintenance: Dirty or dull tools can hinder your ability to add detail or create clean cuts. Always keep your sculpting tools clean and in good condition to achieve the best results.
- Impatience with Detailing: Rushing through fine details or skipping final touches can affect the overall quality of your sculpture. Take your time to refine textures, shapes, and edges for a polished finish.
Conclusion
How to sculpt with clay is both an art and a craft that requires patience, practice, and attention to detail.
By understanding the properties of clay, mastering fundamental techniques, and avoiding common mistakes, you can create pieces that showcase your creativity and stand the test of time. Whether you are a beginner or an experienced artist, taking the time to properly prepare, sculpt, and finish your work will ensure satisfying results.
Remember, sculpting is as crucial as the final product, so enjoy the journey of bringing your ideas to life with clay.
Specialization:
- Master of wheel-throwing, hand-building, and advanced glazing techniques
- Focus on creating both functional pottery and decorative art pieces
Recognition:
- Celebrated by collectors and art enthusiasts for creating one-of-a-kind pieces that blend artistry with functionality
- Participates in local and national exhibitions, earning accolades for his innovative designs and craftsmanship
Passion:
- Deeply committed to exploring and pushing the boundaries of ceramic artistry
- Continuously experiments with new materials, firing techniques, and artistic concepts to evolve his craft
Personal Philosophy:
- Believes in the transformative power of art, aiming to evoke emotions and connections through his ceramic creations
- Advocates for sustainability in ceramics, using eco-friendly materials and practices whenever possible